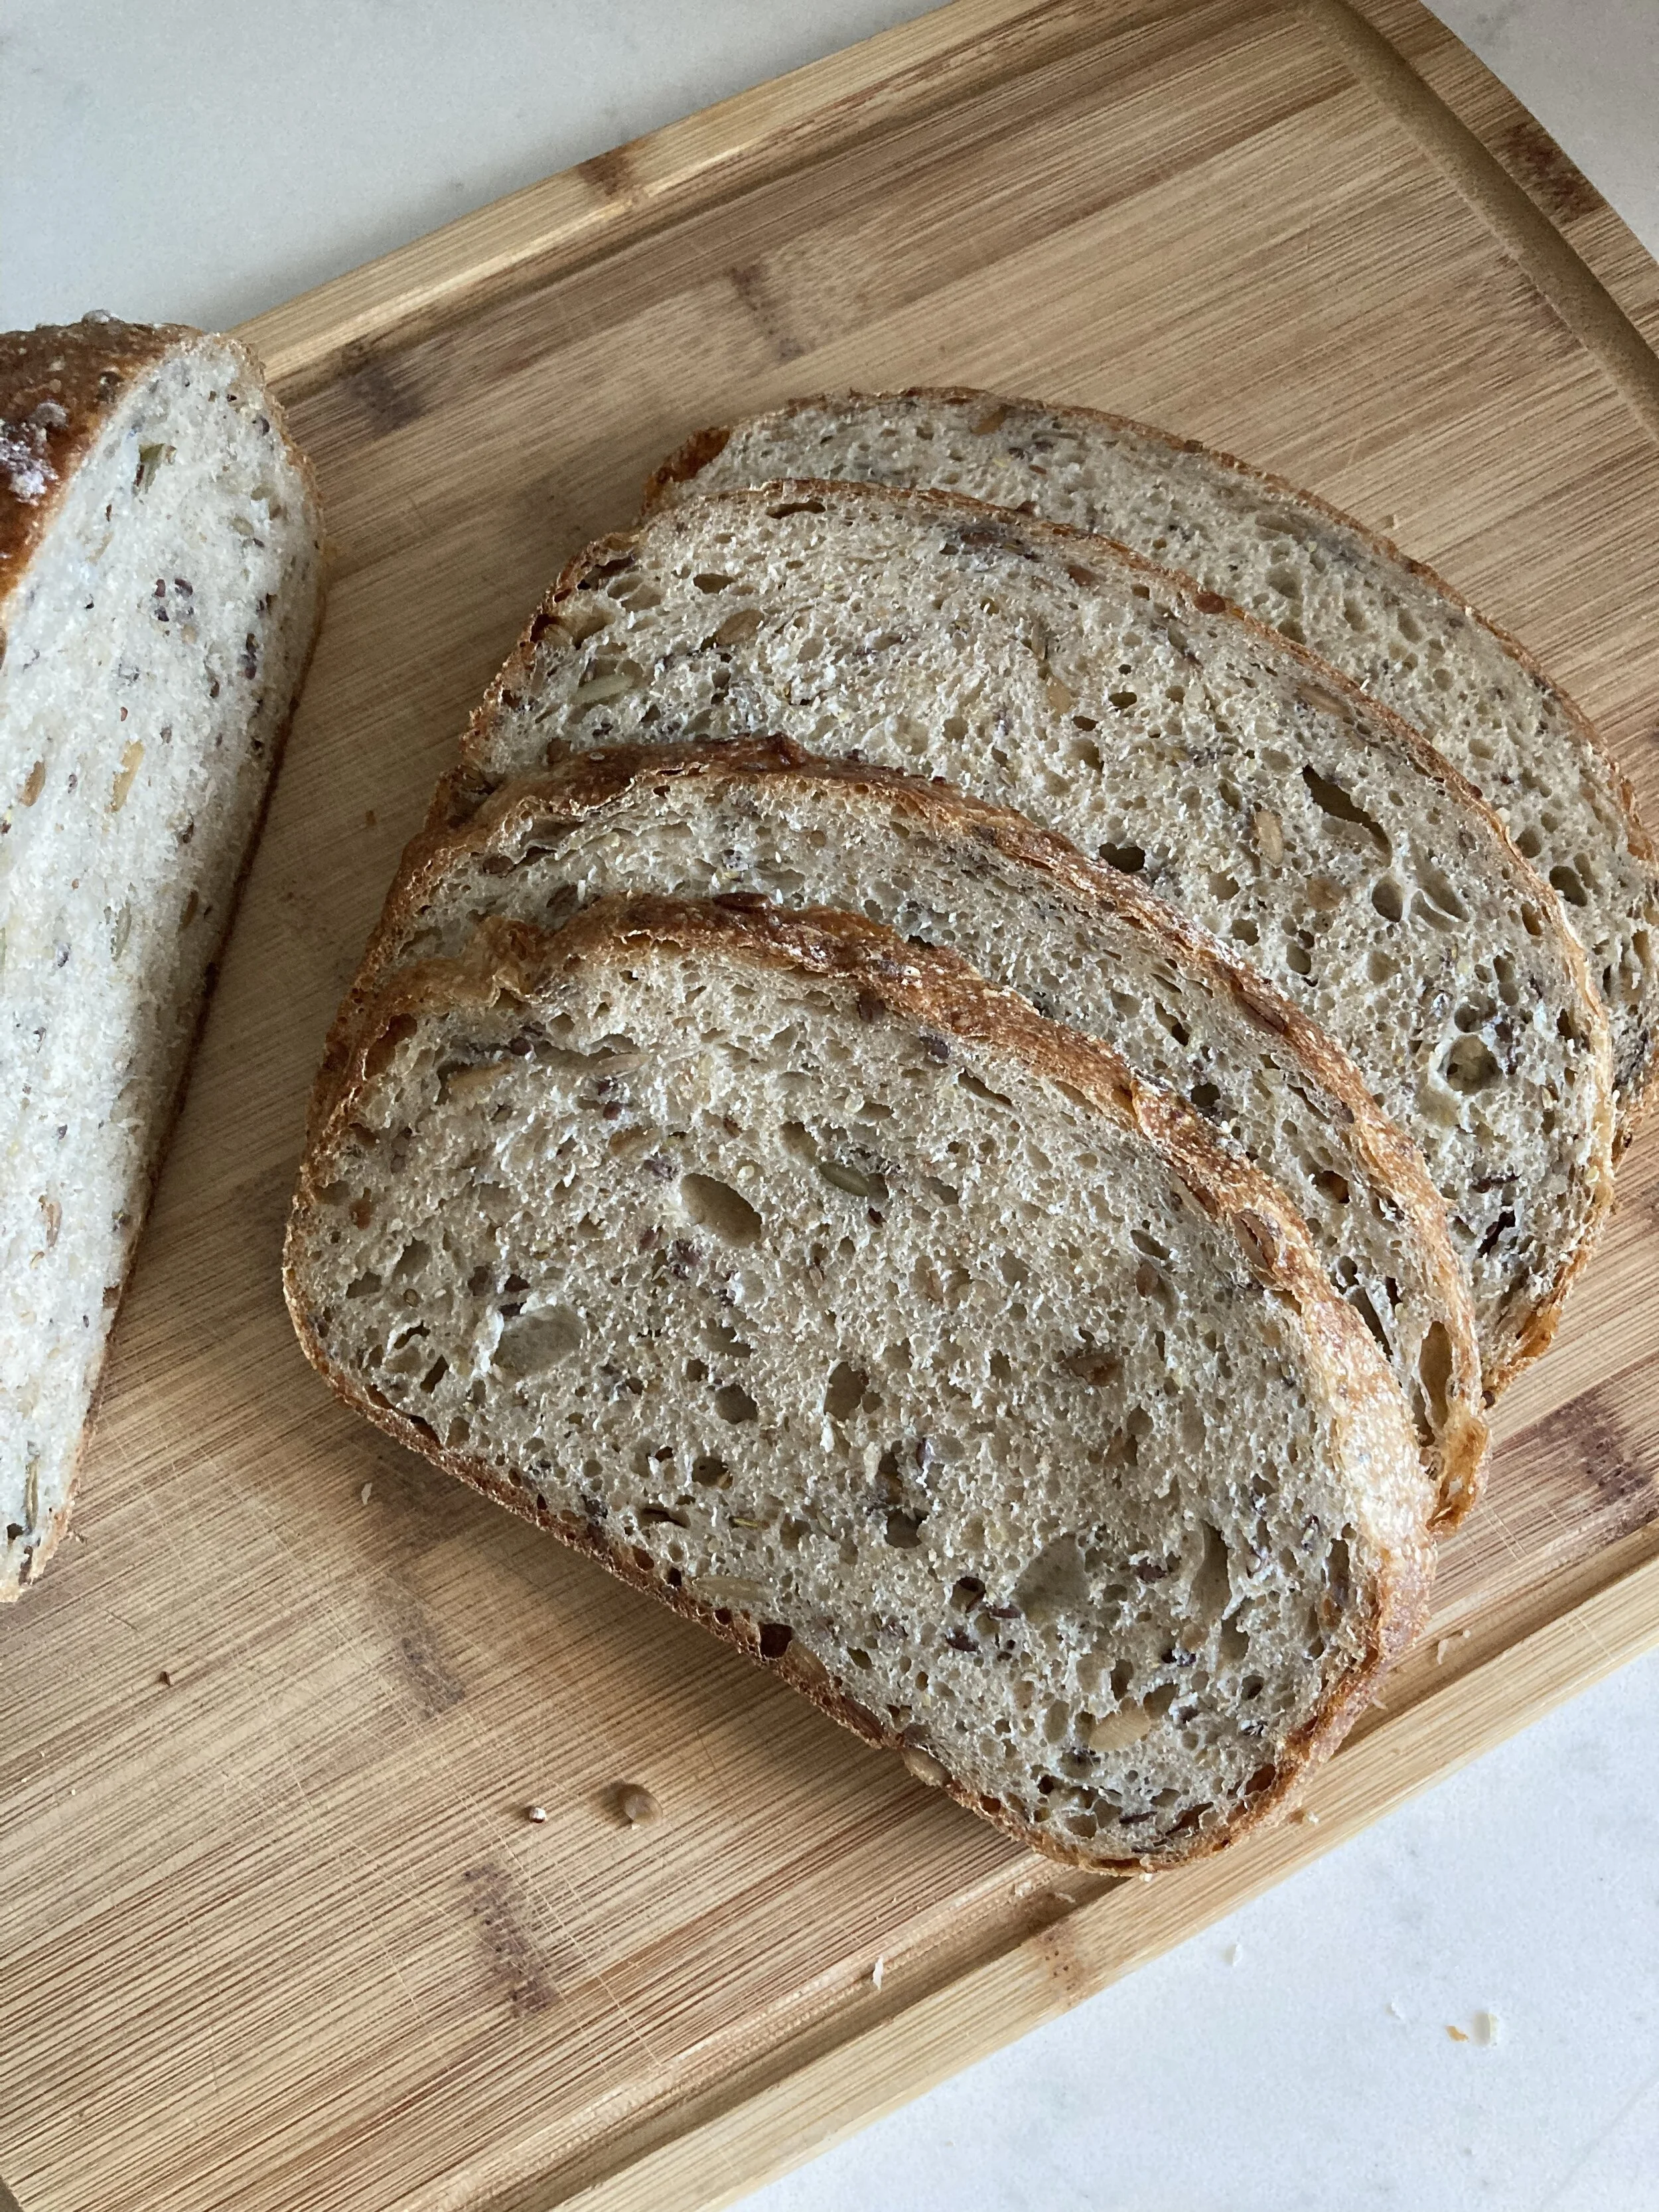
Seedy Multigrain Sourdough Bread
It’s FINALLY here!! I apologize for the long wait for this recipe. I’d like to say I just have really great boundaries about not working in the evenings/while my children are awake, but ultimately I’m just too lazy to do anything productive after 5:30 pm 🤪. If you’re interested in seeing a video of this in real action, head over to my instagram stories. I tried to make it a little more succinct and did some 2X speed. It’s not super cohesive, but it gives you the idea.

It’s FINALLY here!! I apologize for the long wait for this recipe. I’d like to say I just have really great boundaries about not working in the evenings/while my children are awake, but ultimately I’m just too lazy to do anything productive after 5:30 pm 🤪. If you’re interested in seeing a video of this in real action, head over to my instagram stories. I tried to make it a little more succinct and did some 2X speed. It’s not super cohesive, but it gives you the idea.
You’ll need a sourdough starter in order to make this. If you have a friend who makes it, ask them to share the love and give you some. If not, I made my own starter using this post. I’ve been making regular white sourdough for a year and a half now and we’ve really enjoyed it. But THEN.... Then I discovered this bread. I LOVE the nuttiness and chewiness of this recipe and we enjoy it both warm and soft or toasted. And if you want to be really crazy, have it both savory and sweet. Cut a nice thick piece and top half with avocado, garlic salt, and an egg and the other half with almond butter, cinnamon, and strawberries.


This recipe DOES take a long time to make and is a bit involved, so I suggest making it on a Friday/Saturday night and baking the next morning or a Saturday/Sunday morning and baking it in the evening. Either way, the end result is 100000% worth it.
Although I’ve been making sourdough for awhile, I still feel like a novice. I don’t know all the ins and outs of it, and I certainly don’t follow all of the sourdough “rules,” but I find that this works for me. Even if it turns out a little flat, it’s still delicious. One major thing that I do is bake it in a 6-inch saucepan. The smaller circumference of the dish allows it to rise more and completely circular. If you have a saucepan with a lid that can go in the oven, I HIGHLY recommend you do it that way.
This bread is only fresh for the first few days, so I recommend cutting and freezing a few pieces if you don’t expect to eat it everyday. However, there are weeks that we have zero difficulty eating it all. I am perfectly okay with eating it everyday, or even twice a day. 😉
If you end up making this, please please let me know what you think!!

Seedy Multigrain Sourdough Bread
Ingredients
- 50-75 g sourdough starter
- 300 g water
- 100 g whole wheat flour
- 400 g all purpose flour
- 10 g salt
- 2 Tbsp pepitas (pumpkin seeds)
- 2 Tbsp millet
- 2 Tbsp sunflower seeds, salted
- 2 Tbsp quinoa
- 2 Tbsp flax seed
- 3 Tbsp oats (old fashioned or quick)
- 3/4 cup boiling water
Instructions
- Feed your starter with 1/4 cup all purpose flour and 1/4 cup water 1-2 hours before making dough to activate your starter. You can add a teaspoon of starter to a bowl of water to see if it is ready. If it floats immediately, it’s ready to make bread with.
- Using a food scale, add 50-75 grams of sourdough starter to medium sized bowl. Add 300 grams of water and stir to combine. Add whole wheat, all purpose flour, and salt and stir until fully combined. You may have to use your hands to get it fully incorporated. Cover with saran wrap or wet towel and set aside for 30 minutes. Meanwhile, combine all of the seed/grain mixture in a small bowl and add boiling water.
- After the dough and seed mixture have rested for 30 minutes, add the seed mixture and combine with your hands until is it fully incorporated. Cover and set aside for 30 minutes. Once your timer goes off, “stretch” the dough by wetting your hand, grabbing the dough and pulling it up and towards the center, and continuing in a counter clockwise direction until you’ve stretched the dough 1-2 times completely around. Cover and stretch 1-2 times more (30 minutes apart) or just leave on the counter. More stretching increases the gluten structure strength. Leave the dough on your counter for 8-12 hours or until it is jiggly and has bubbles.
- Preheat the oven to 500 degrees Fahrenheit. Meanwhile, heavily flour a work surface and place dough on the flour. Shape the dough by folding the dough in a counterclockwise direction. Once you’ve gone completely around, flip the dough seam-side down and tuck the dough under. Place into a large dutch oven with parchment paper or a greased 6 inch oven-safe sauce pan seam side down. “Score” the dough by cutting the top of the dough with a sharp knife.
- Turn the oven down to 450 and place the dough in the oven WITH the lid on and bake for 20 minutes. Take the lid off and bake for an additional 30 minutes.
- Once the bread is fully baked, take out of the pan and cool on a cooling rack for an hour. Devour! Store in an airtight bag or container for up to 4 days.
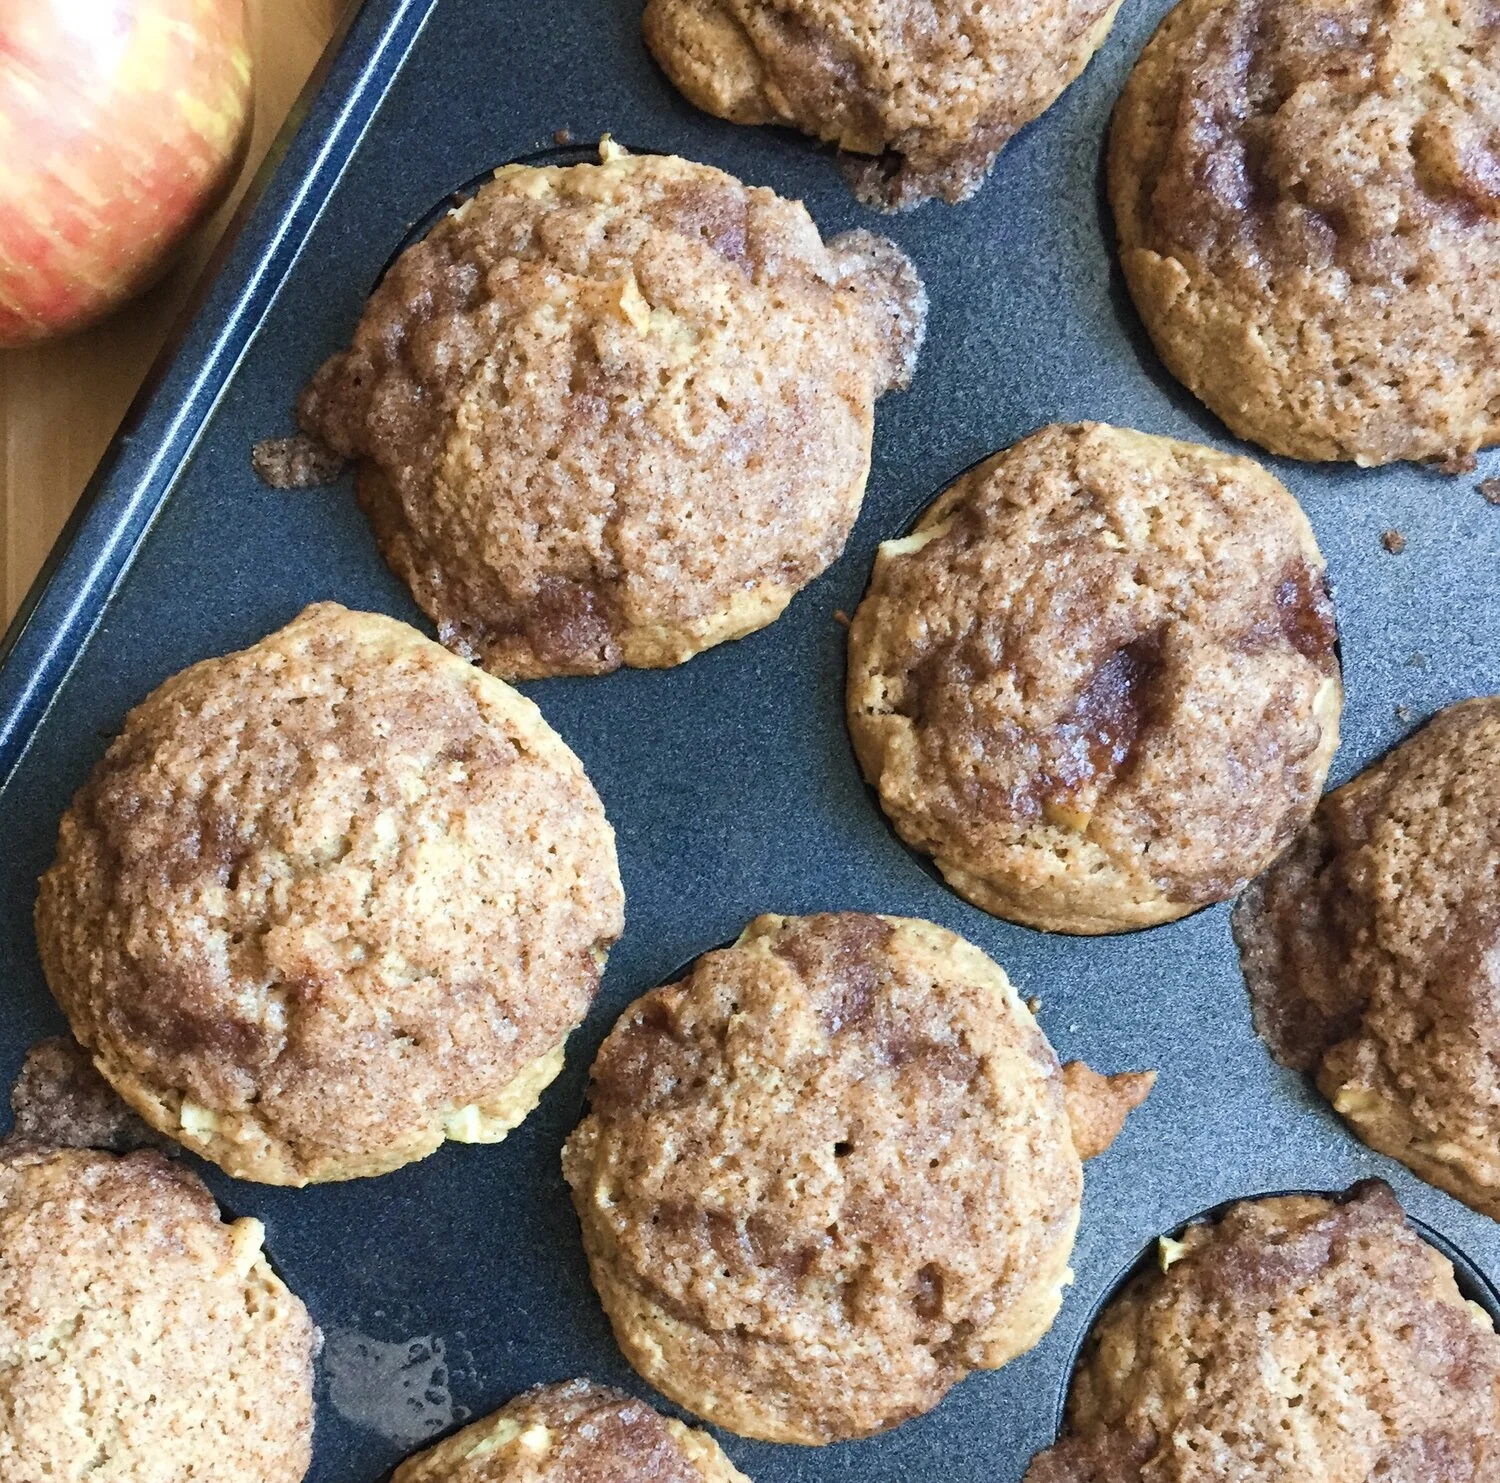
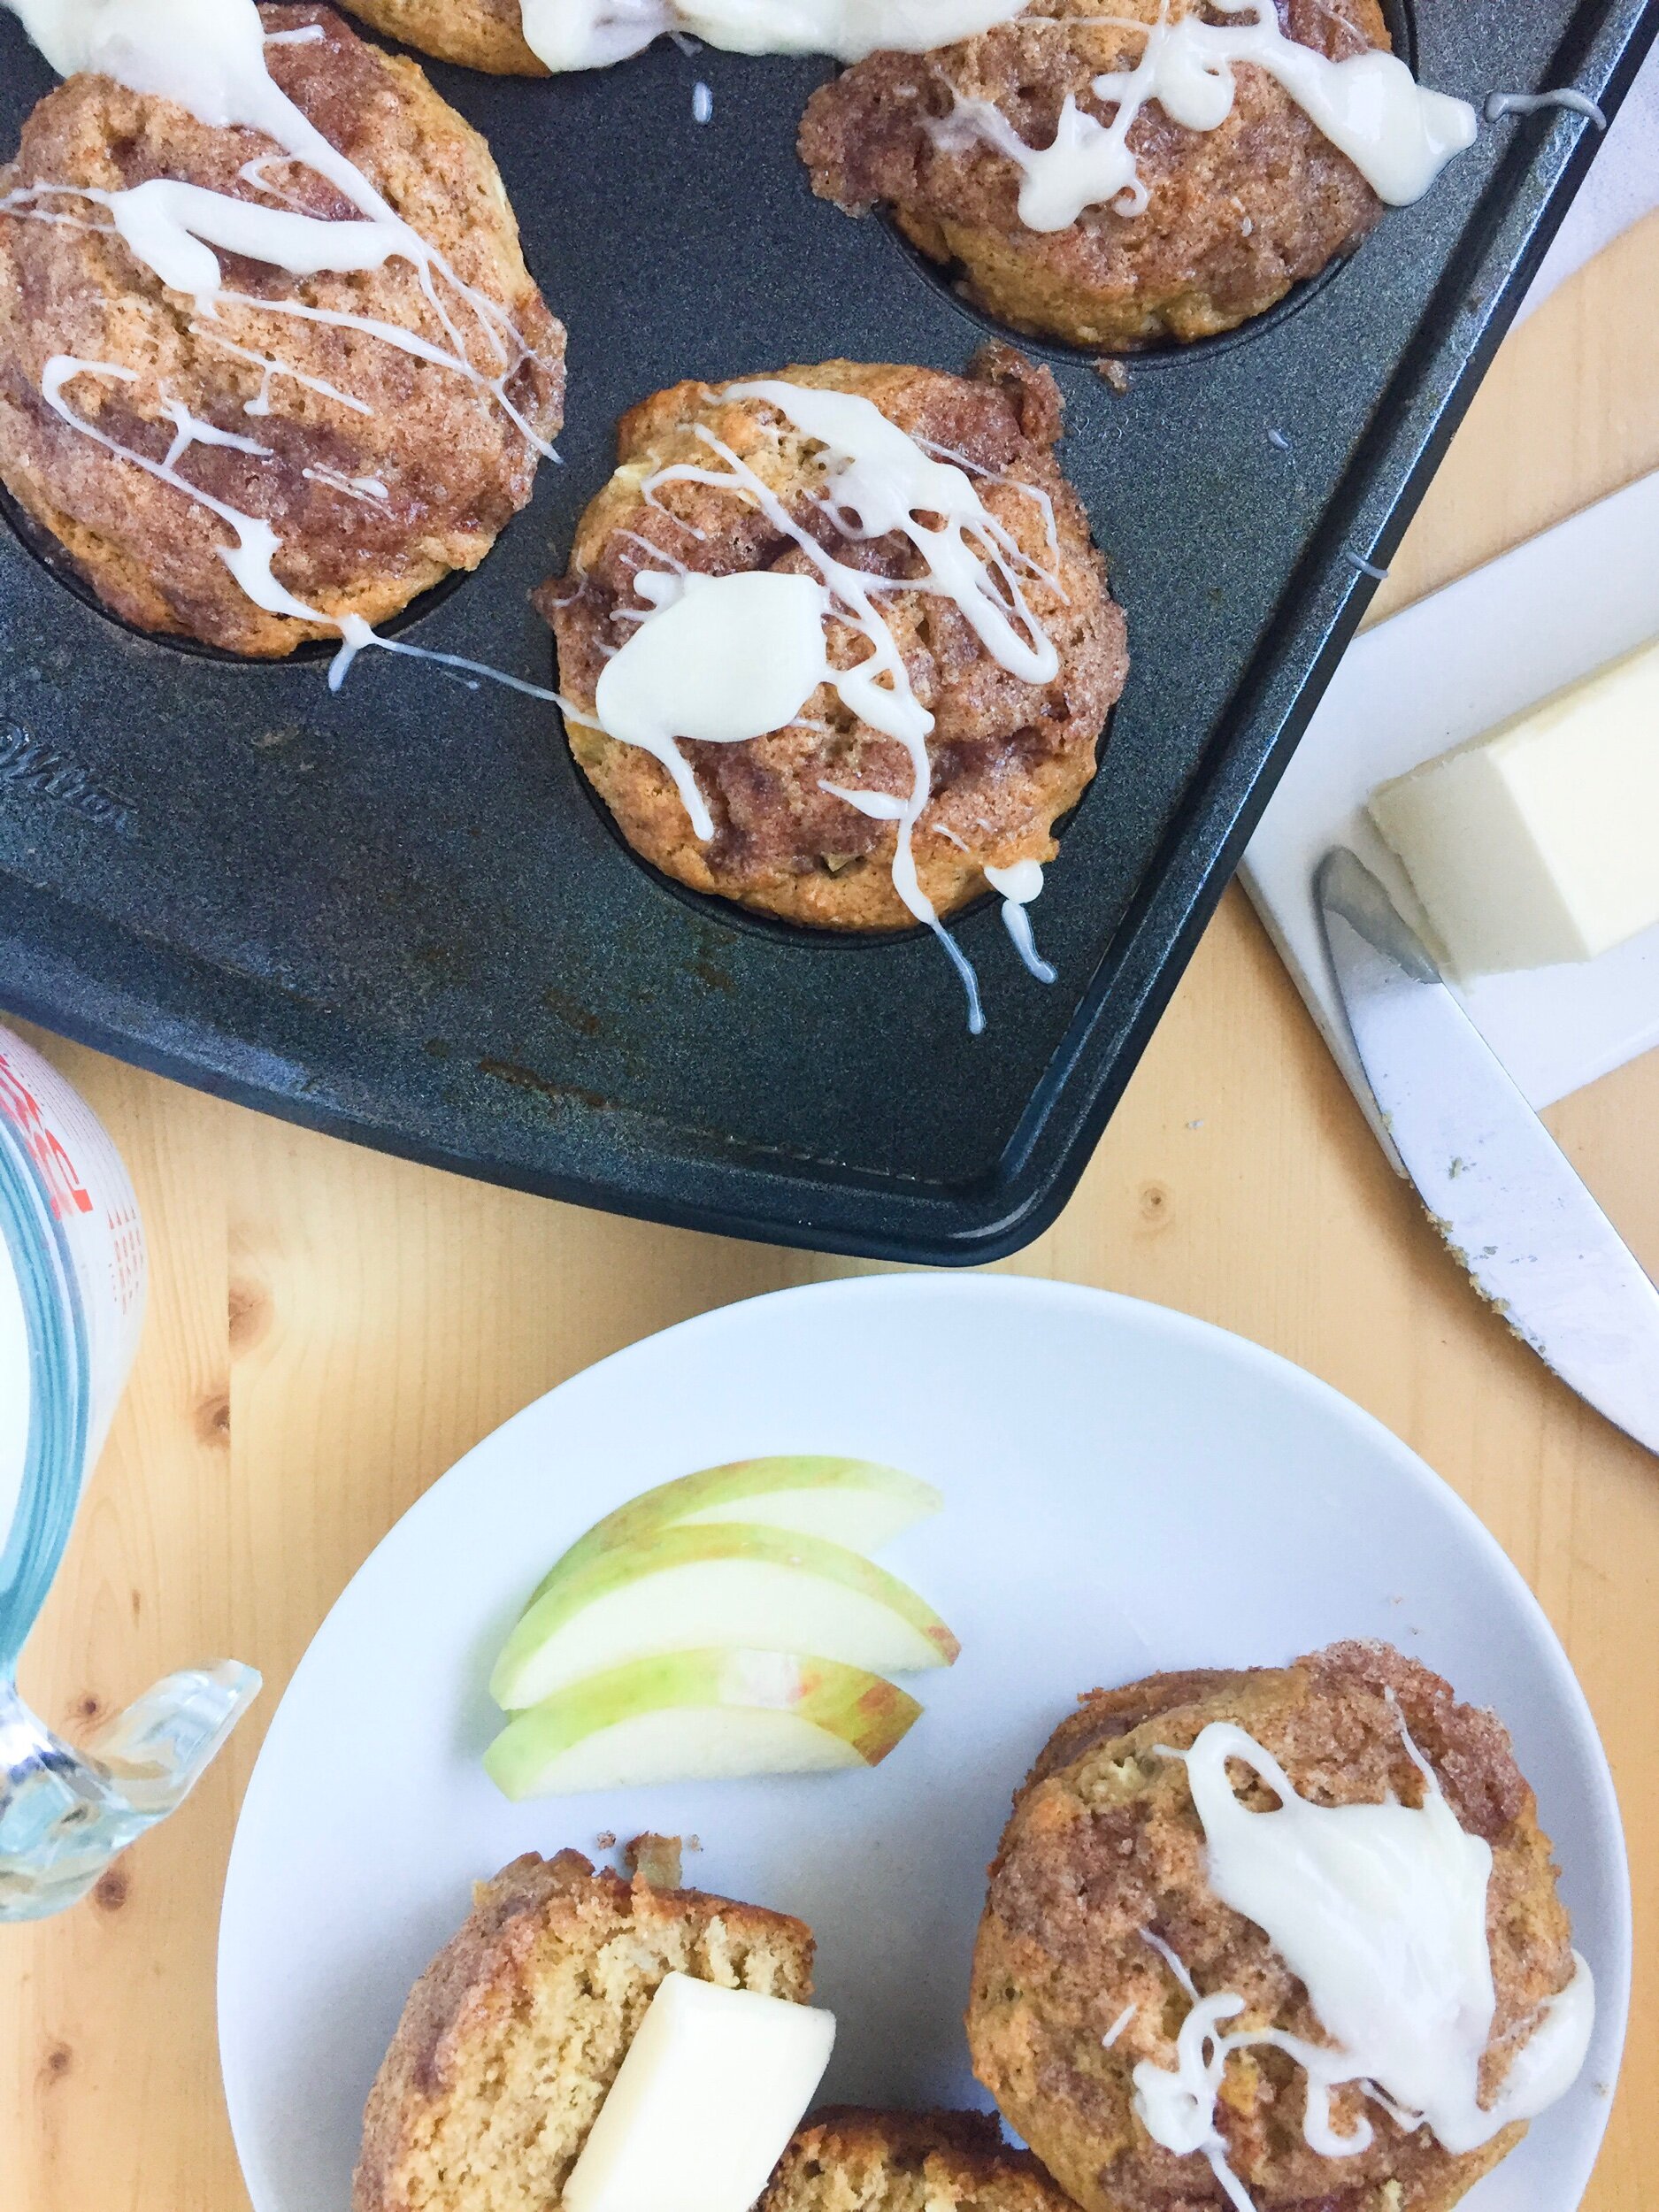
Fall Apple Muffins with Crunchy Cinnamon Topping
This recipe was created in collaboration with Midwest Dairy as part of the dairy community’s Undeniably Dairy campaign . I was compensated for my time, but the content and opinions included are my own.
It’s fall, ya’ll…or can we agree it’s basically winter already?? It’s currently 16 degrees outside as I write this. Holy moly, summer transitioned into winter quickly! But to be honest, I’m loving cozy sweaters and pajama pants, candles, hot coffee, and pumpkin spice EVERYTHING. If you follow me on instagram, you know that I’m already listening to Christmas music. There’s no shame in my game.
So in light of the changing weather, fall produce, and the upcoming holidays, I am bringing you these delicious fall apple muffins with crunchy cinnamon topping!!

My neighbor recently had a baby (I promise this is a relevant story), so I wanted to bring her family some snacks to eat on while they figured out a rhythm for taking care of a newborn. I know when we had Camden that meals brought to us was so helpful. And I also know that my hunger was like none other, so snacks and substantial meals were essential. I found an apple muffin recipe that I made for them, but found them to be super dry and dense, and they weren’t sweet enough for my preference. So I decided I needed to perfect my own apple muffin recipe. After a few tries, I found a recipe that brings the right amount of sweetness (it’s there, but not overly so) and is tender and moist.

A few of my tricks for this recipe is the buttermilk, almond flour, and preparation technique. Now, I’m sure you could use regular milk (you know, because thinking AHEAD to get buttermilk doesn’t always happen), but buttermilk gives it moisture and a nice fluffy texture. Leftover buttermilk is great for pancakes, biscuits, scones, and even oven fried chicken nuggets. The majority of the flour used is white whole wheat and all purpose, but I added a little almond flour to make them more moist. It’s actually a trick I use in a lot of my baked goods. Lastly, I made sure to not over mix the batter. The instructions included help to minimize mixing so that your muffins don’t turn out like a rock. You’re welcome. 😉

Oh and that crunchy cinnamon topping? It’s optional, but not really optional, if you know what I mean. It reminds me of coffee cake…which is why I think you should make them for a thanksgiving/friendsgiving/special-family-gather brunch. And if you want to make them a little more fancy, just drizzle some powdered sugar icing or cream cheese frosting on top!

I’d love to hear if you made these and what you think!!

Fall Apple Muffins with Crunchy Cinnamon Topping
Ingredients
- 1 C buttermilk (warmed in microwave for 30 seconds)
- 1 egg
- 1/3 C melted coconut oil
- 1/4 C maple syrup
- 1 1/4 C white whole wheat flour
- 2/3 C all purpose flour
- 1/3 C almond flour
- 1 tsp baking soda
- 1 tsp baking powder
- 1 tsp cinnamon
- 1/2 tsp salt
- 1 1/2 C finely diced apple (granny smith, pink lady, or honeycrisp)
- 2 Tbsp unsalted butter, melted
- 3 Tbsp white sugar
- ½ tsp cinnamon
Instructions
- Preheat oven to 425.
- Finely chop apple and combine with remaining dry ingredients. Mix together.
- In a separate bowl, microwave the buttermilk to warm it slightly. If not, the melted coconut oil will solidify and make mixing difficult. Add the egg, maple syrup, and coconut oil.
- Fold the wet ingredients into the dry, being careful to not over mix the batter (that makes them dry and dense). Grease a 12 muffin tin and divide the batter evenly—the tins will be full.
- Microwave the butter and add the sugar and cinnamon and mix. Top muffins with a teaspoon or so of mixture.
- Bake for 5 minutes, decrease temperature to 400 and bake for an additional 10 minutes. Muffins are done when a toothpick comes out clean.
For more dairy inspired recipes, you can check out https://dairygood.org/recipes.

Homemade Maple Oatmeal Bread
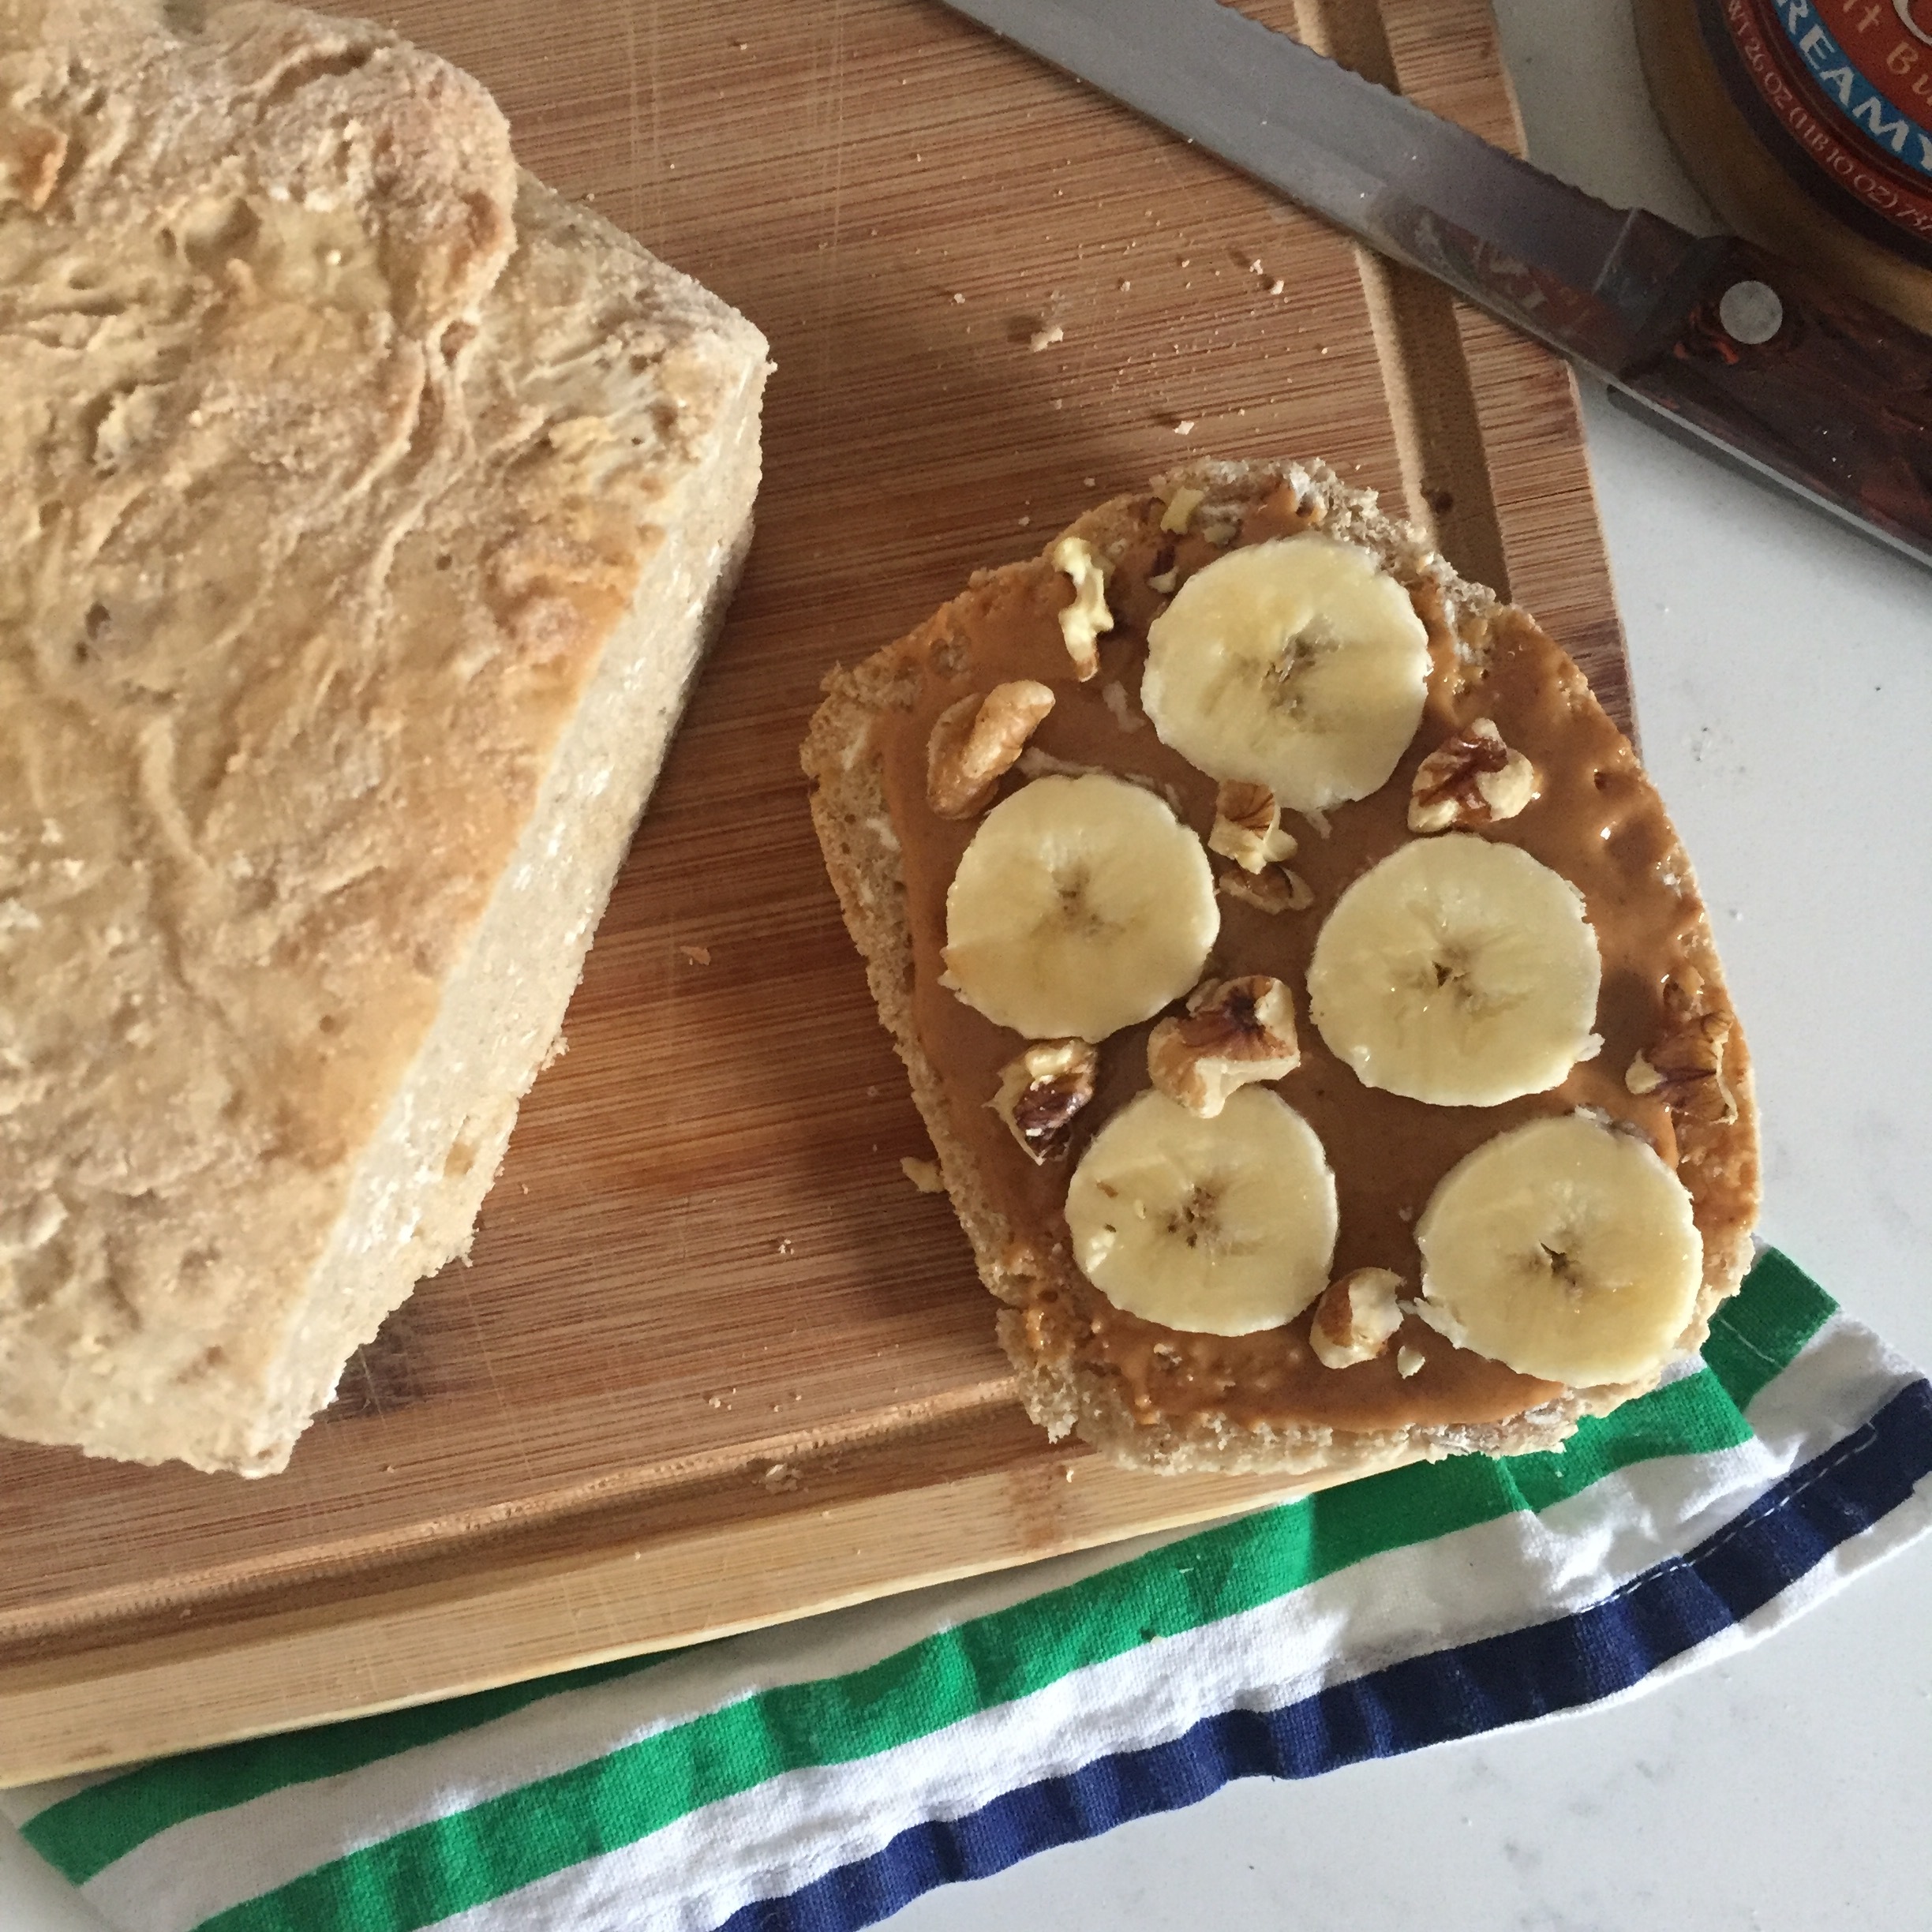
Hello readers! I recently posted an instagram story of a peanut butter and banana sandwich on homemade bread for a snack I was eating (because lately second breakfasts are a much needed thing) and I got several requests for the recipe for the bread. So per your request, I whipped up another batch to take some pictures (and let's be honest--so that I could have it for snacks/meals again this week) and am providing the recipe here!....You're welcome.

In high school, one of my best friend's mom made everything from scratch, including their bread. I mean, she would make their burger buns homemade. Talk about GOALS. And pretty much everyday my friend would pack a peanut butter sandwich on her mom's bread for lunch at school. One weekend I spent time with them and her mom brought me a pb sandwich and I was IN HEAVEN. The bread is dense and chewy and it goes perfectly with peanut butter and banana. And don't get me started on how great it is toasted. I don't know what it is, but it's got the perfect crunch.
I tried making the bread throughout high school, but could never get the dough to rise and I always ended up with a brick. Thankfully I no longer try to make recipes with dense whole wheat flour and sugar free pancake syrup 🙈 (it doesn't work, people). When I got married, my friend's mom was so sweet to give me a bread machine so that I could always make her bread for Isaac and I. Now, I don't actually use the bread machine for this recipe, but that's only because I don't know where the manual is for it and I have no clue which option to choose 😂

So the good news is that you can make this bread in your regular 'ol oven! And it's super fast because you don't have to wait hours for it to rise--instead you just need 20 minutes of rising time (see the recipe instructions below)!
I can't wait to hear about how it turns out for you and what you think!

Maple Oatmeal Bread
Ingredients
- 2 round tsp yeast
- 1 1/8 C warm water (or 1 cup and 2 Tbsp)
- 3 C all purpose flour (I use 2 C AP and 1 cup white whole wheat)
- 1 C old fashioned oats
- 1 tsp salt
- 5 Tbsp maple syrup
- 1 Tbsp neutral oil
Instructions
- Turn oven to 180 and place a shallow dish with 1/2 inch water on bottom rack. Mix yeast in warm water and set aside for 5 minutes. In a mixer with dough attachment hook, add all remaining ingredients, stir to mix, and then add yeast mixture. Mix on low for several minutes. Place in greased loaf pan and place in oven for 20 minutes to allow it to rise. Take loaf and shallow dish out of oven and increase oven to 350. Once it reaches 350, place dough back in oven and cook for 25 minutes. Cool bread before removing from the pan and cutting. Enjoy!