
Protein Packed Kodiak Cakes Monkey Bread
Get a LOAD of this....
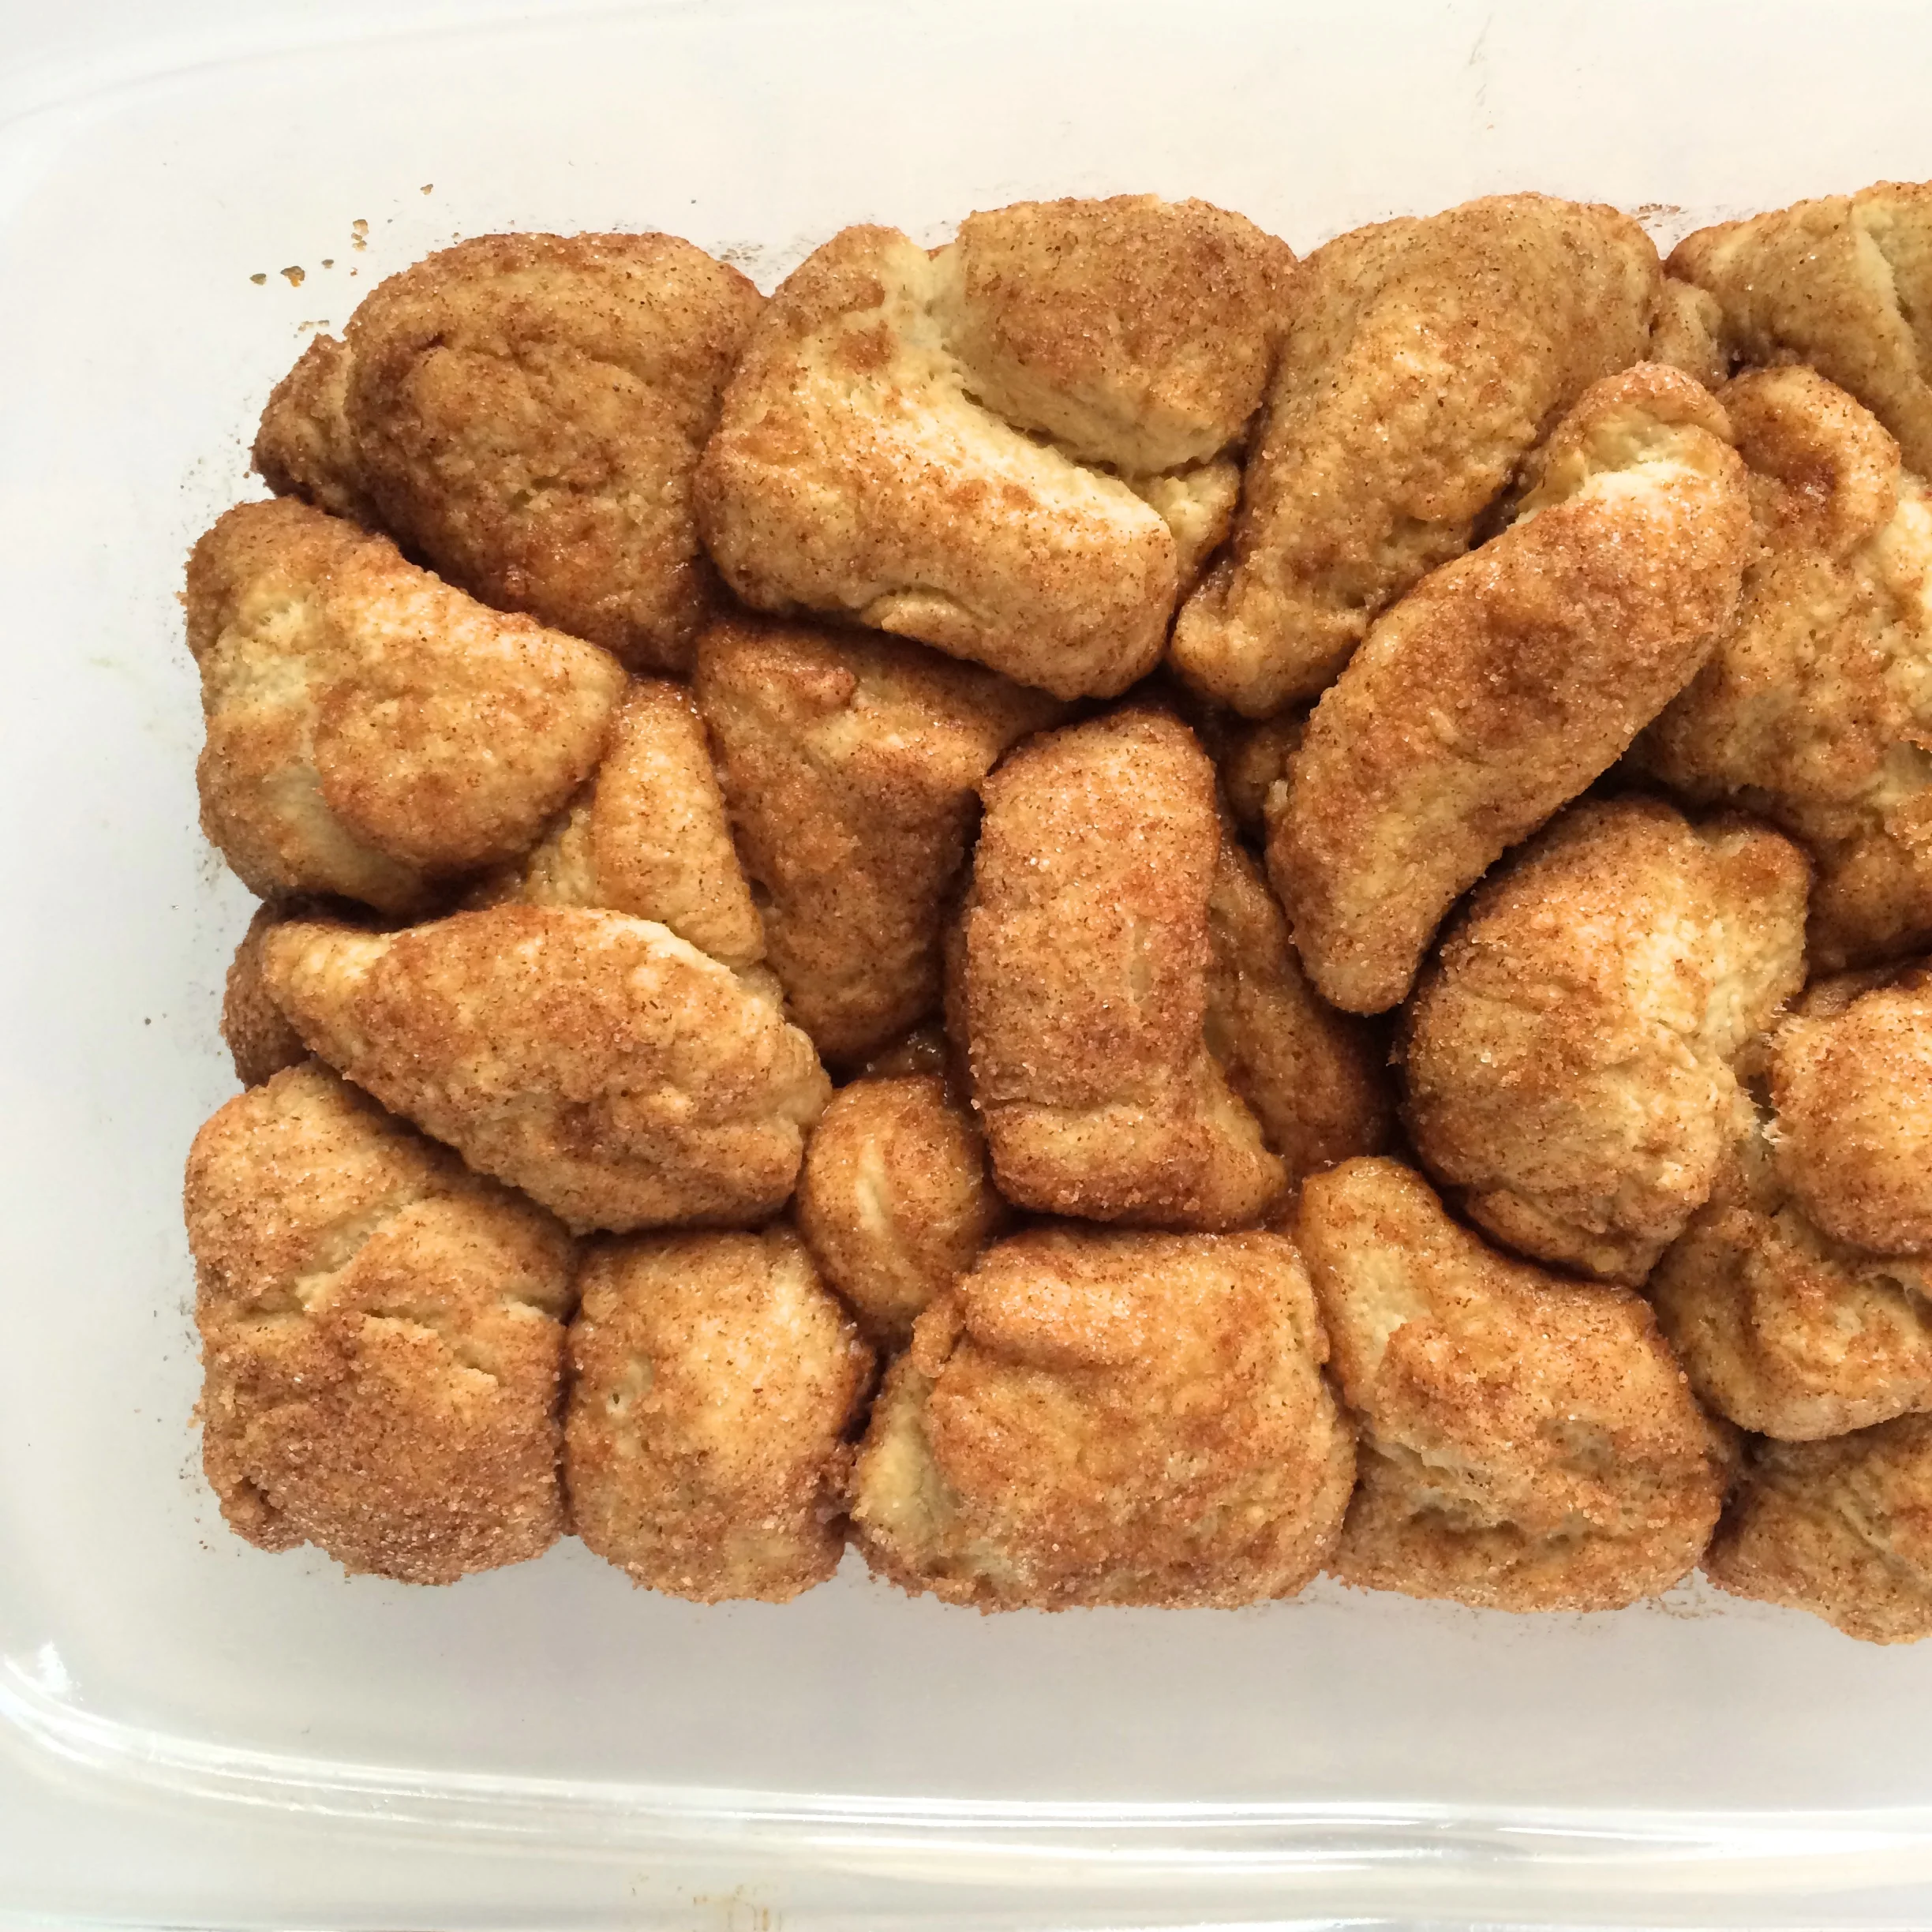
Monkey bread. Please tell me you have eaten it before? Isn't it so delicious?? All ooey, gooey like? If you have not, I am very excited to introduce you to this dessert that disguises as breakfast 😉. I've recently started experimenting with Kodiak Cakes pancake mix and am loving how easy it is to use and how delicious the recipes are turning out.

The thing I love about the Protein Packed Kodiak Cakes pancake/waffle mix is that it is made with whole wheat flour, oat flour, and is higher in protein than normal pancake mixes. Can you say staying power from increased fiber and protein?? I have issues with my blood sugar getting low, so protein in the morning is a MUST. I cannot do straight carbs. So the protein packed mix is a winner for me and my body.
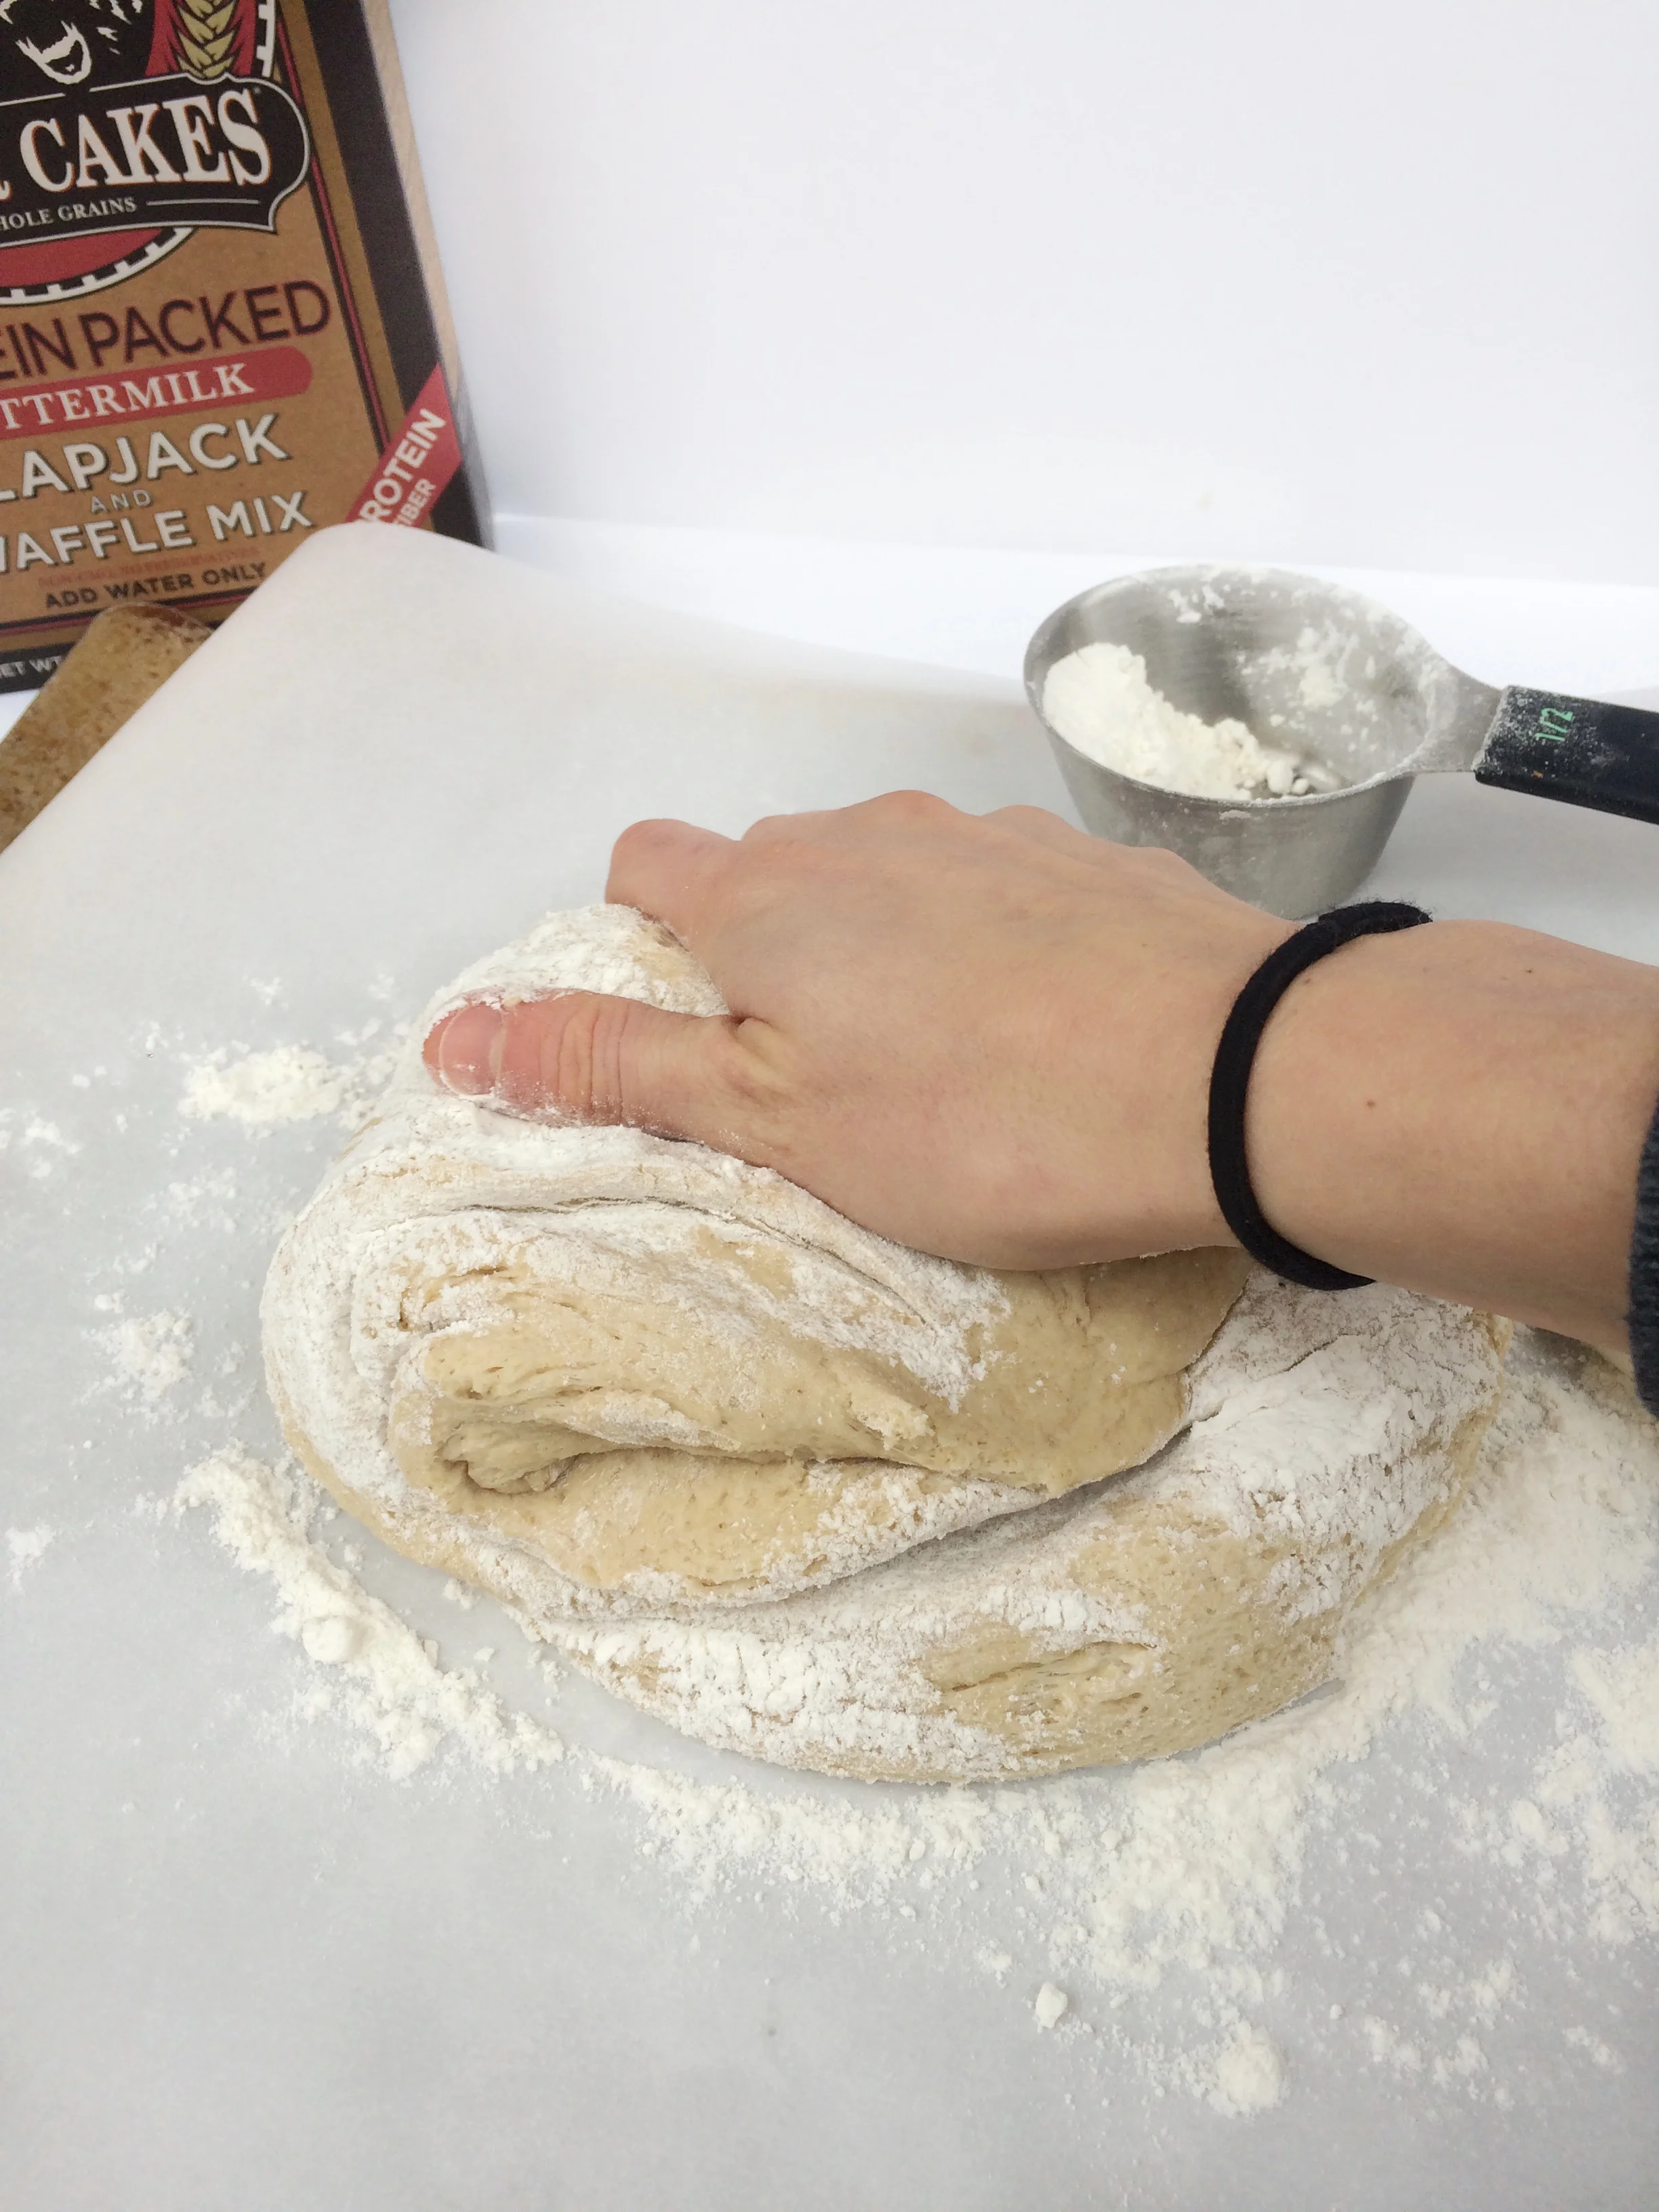
I used the kodiak cakes mix as the base and then added additional flour, yeast, milk, butter, and sugar. I tried several batches to get the recipe just right for you all. The first batch I accidentally did half of the dry ingredients with the full milk amount. Gosh, it took me a while to figure out why the dough was so wet.🙈 The end result was delicious but had more of a coffee cake texture and I was going for a yeast bread texture. The next batch I used white whole wheat flour in addition to the pancake mix and it turned out more dense and dry. Next!! The third time was a charm. I used all purpose flour and the end product was light and fluffy and delicious!!

I used coconut oil for the coating, but you can definitely substitute butter. I just happen to like the taste of coconut oil in my baked goodies, especially cookies 😍. As for how to best eat these, I recommend topping it with some powdered sugar glaze or Wild Friend's gingerbread peanut butter (it is seriously SO good!) and eating it with some eggs for breakfast, as a snack, or for dessert after dinner. I did all of the above...


Favorite Oatmeal Recipes Roundup
Sooo...let's get real. I like oats. A LOT. One look at my instagram account and you'll discover that very quickly. I went scrolling through my account to get some inspiration about my favorite recipes and holy moly. It made me want to eat oatmeal for every meal for the next week!! Okay, maybe not every meal, but it reminded me of how dreamy oats are.

I love eating oats because they can be hot, cold, creamy, doughy, cakey, etc. The possibilities are endless!! It honors my cravings for sweets, fills my desire for doughy textures, and the fiber content keeps me full and my blood sugar stable for several hours. I wanted to share several of my favorite recipes with you so that you can mix up your breakfast routine or get into oatmeal if you're not already into it. I seriously had oats in some form for breakfast for like a year straight. I can help you out!
This is one of the first oatmeal recipes that got me into the world of oats--whipped banana oatmeal. I love topping it with chopped apples, flax seed, and walnuts. <3

Then after my whipped oatmeal phase, I got into various baked oatmeal recipes. Here are a few of my faves...The one below is from Immaeatthat. Kylie knows how to do a baked oatmeal :-D
For the chocolate brulee below, I just top it with peanut butter instead of stuffing it inside. LOVE the crunchy topping! I'm all about mixing crunchy with a doughy texture.

This one is even doughier than the brulee one. It's more like bread pudding (insert heart eye emoji here). Ooey gooey in the middle, crunchy on the top!!

Then I got into overnight oats. I make mine a variety of different ways. Cooled coffee gives it a nice flavor like in this recipe.

http://24carrotlife.com/2015/05/03/latte-overnight-oats-vegan/
Other times I mash part of a banana, add oats, chia seeds, pb2, and milk into a bowl, stick in the fridge and then top with fruit, nuts, and peanut butter in the morning. Ohemgee...
And now with the weather FINALLY getting cooler, and my love for espresso continuing to grow, I canNOT wait to try out this recipe below for an oatmeal latte. It's genius!!

http://www.howsweeteats.com/2016/03/how-to-make-an-oatmeal-latte/
What do you think? Have you tried any of the recipes above? Have a recipe I just HAVE to try? Let me know!

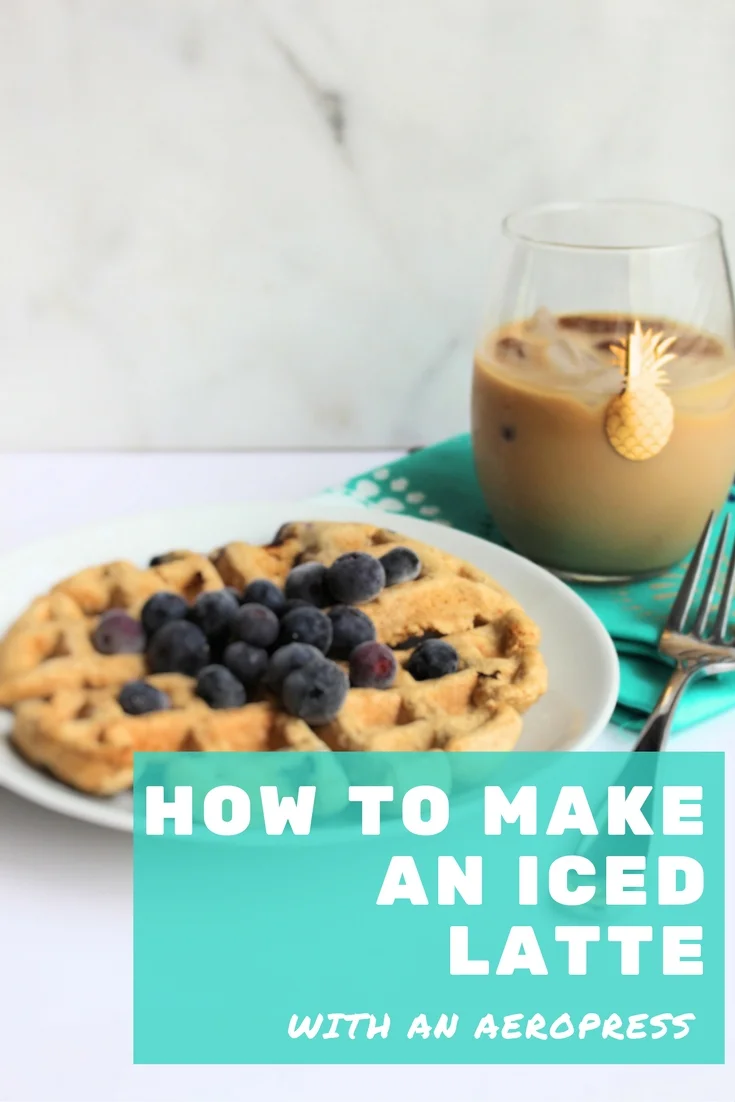
*GIVEAWAY*!!! How to make an iced latte with an aeropress
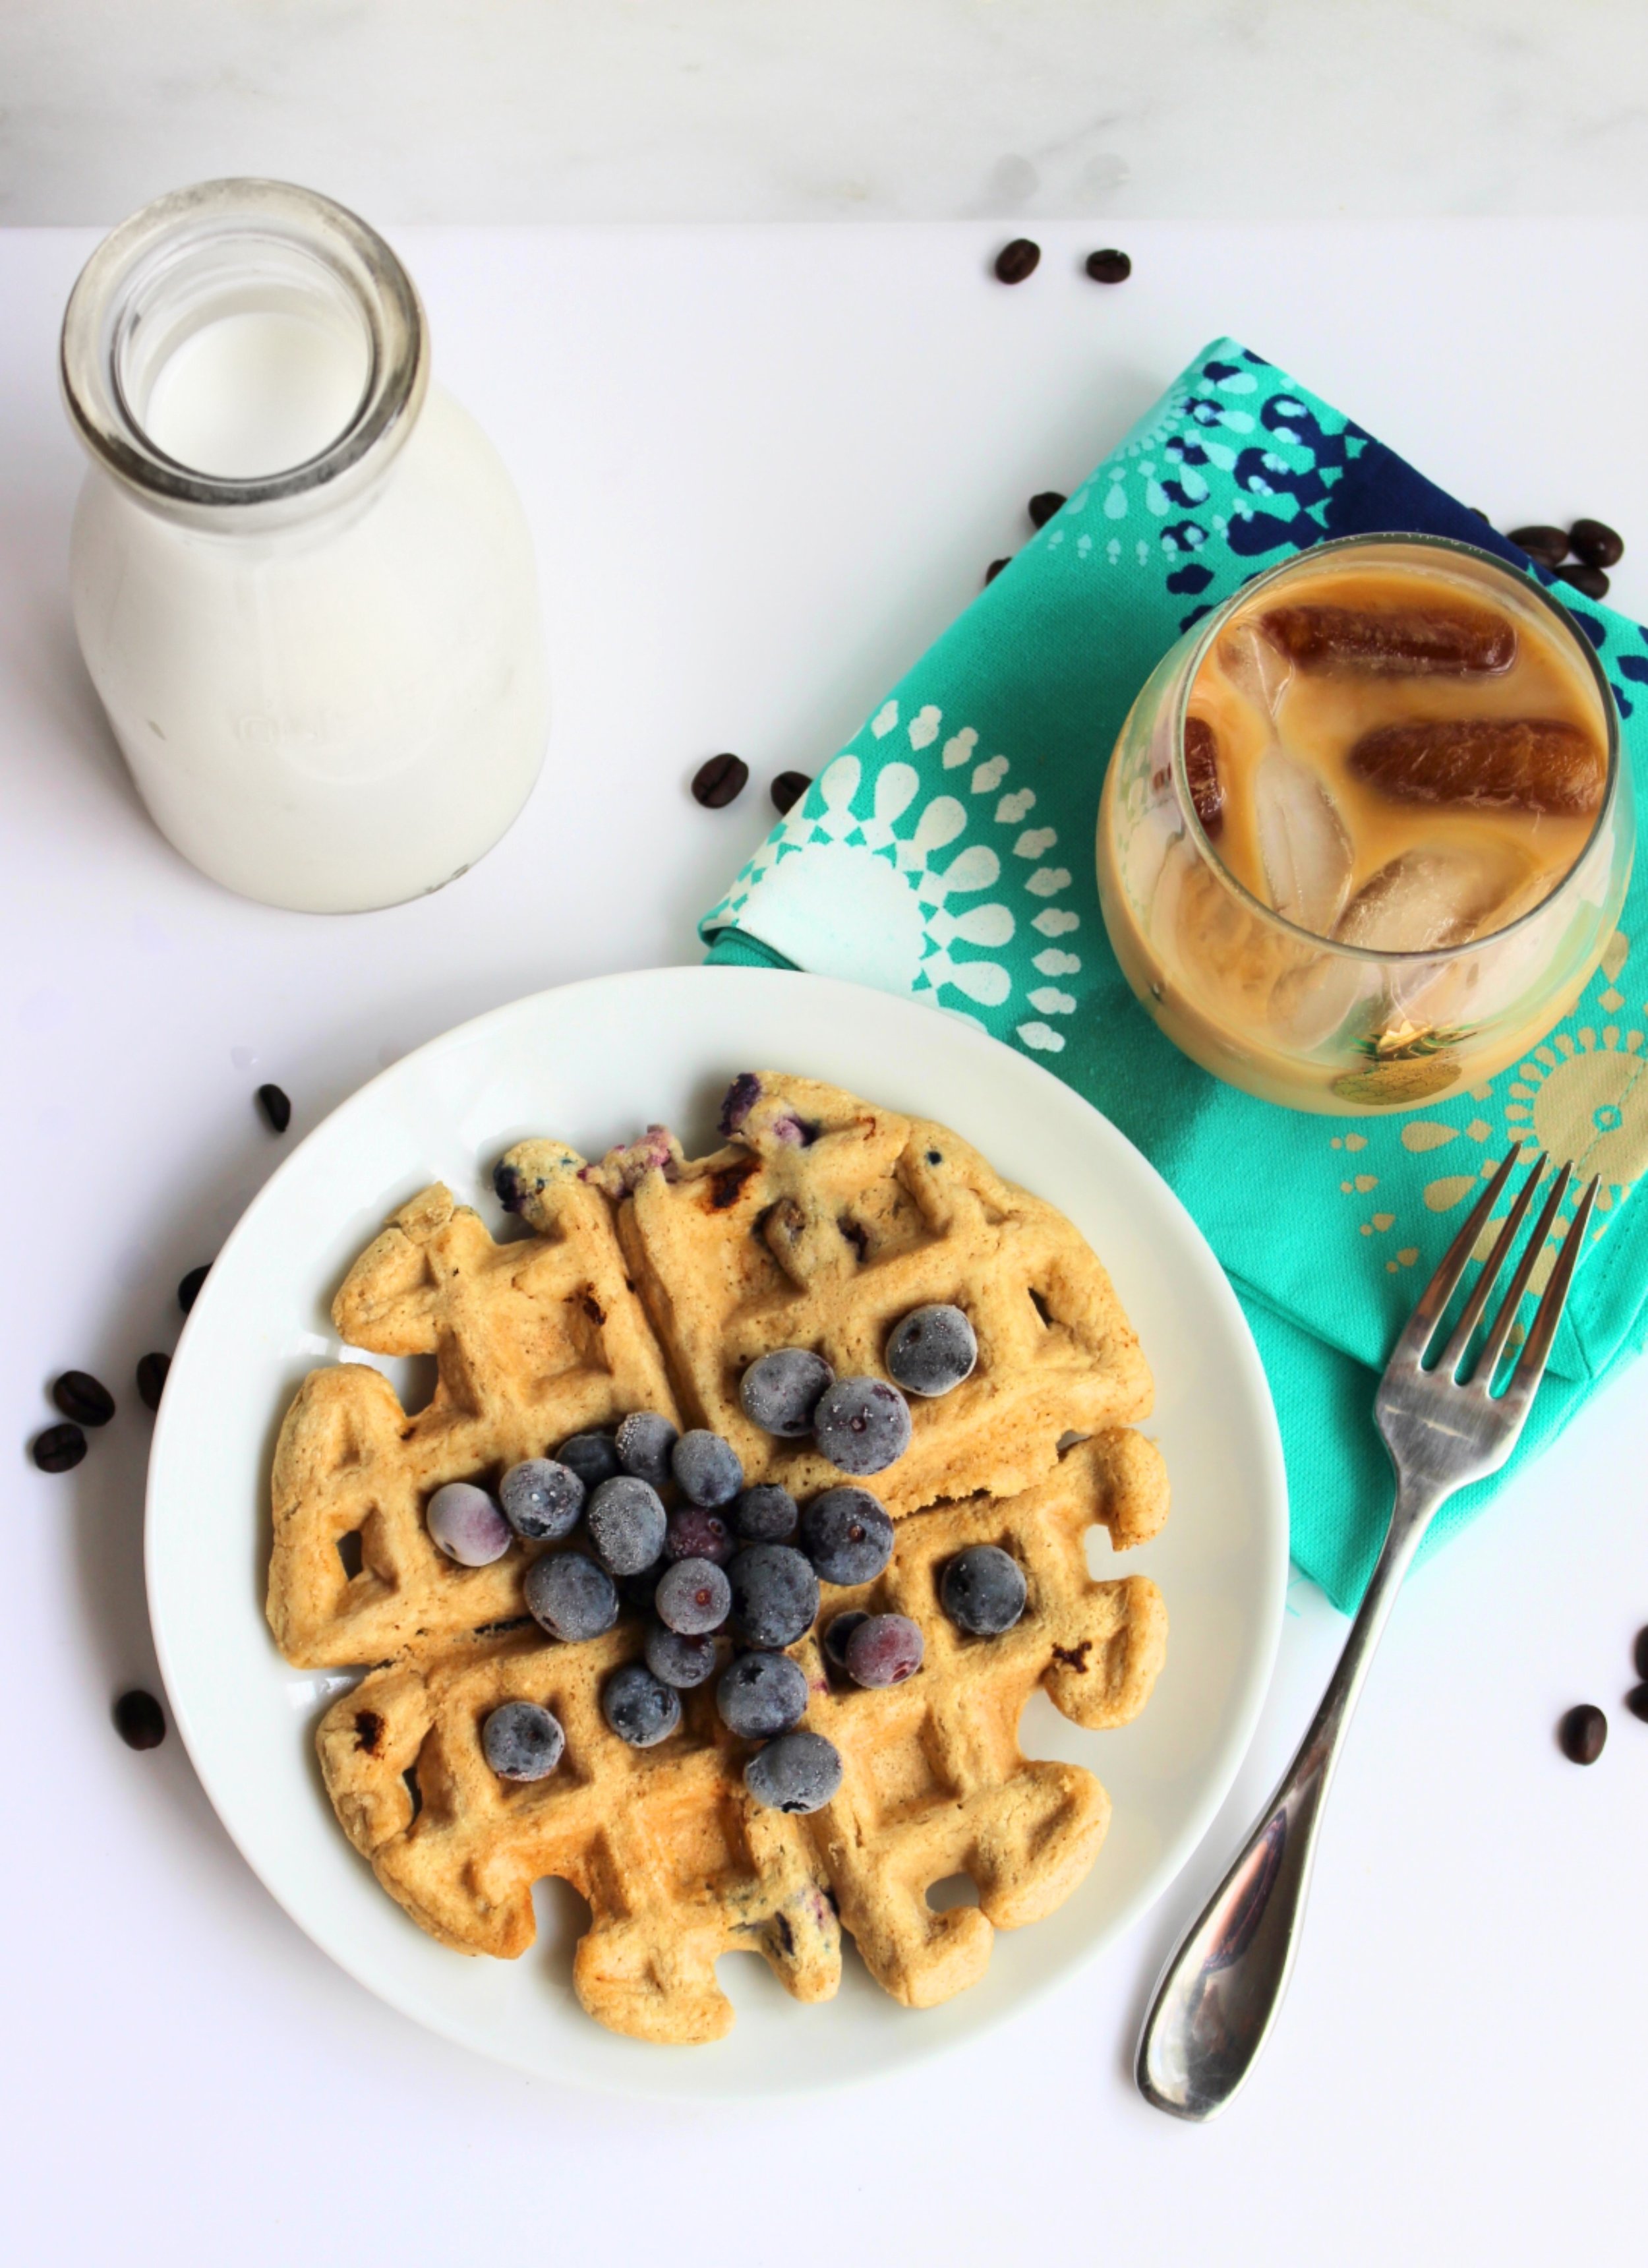
If you've followed me for a hot second on instagram, you know that I love iced lattes. I can't think of a meal that an iced latte wouldn't make complete. Iced lattes all day, every day :-) However, at $5 a drink, it's not a habit I can afford to keep regular. I mean, Isaac only lets me allocate $40 a month for blow money #budgetprobs. So awhile back I started to experiment with making my own iced lattes.
Although Aeropress is sponsoring this giveaway, I was not compensated for my time and all opinions are completely my own.
If you've followed me for a hot second on instagram, you know that I love iced lattes. I can't think of a meal that an iced latte wouldn't make complete. Iced lattes all day, every day :-) However, at $5 a drink, it's not a habit I can afford to keep regular. I mean, Isaac only lets me allocate $40 a month for blow money #budgetprobs. So awhile back I started to experiment with making my own iced lattes.
Then came a string of very disappointing iced drinks. I tried brewing strong coffee over ice, cooling brewed coffee and adding milk and ice, instant coffee with ice and milk, and even tried making espresso with a mokapot. All resulted in watered down coffee/milk (or a disgusting, bitter product with the mokapot) that I always poured down the drain. Wah wah. Then an amazing thing happened. My husband bought me an aeropress (and burr grinder--fancy fancy) for our anniversary. Really, I think it was more of a gift for himself than for me (sorry, babe), but it turned out to be the best. gift. ever. After a few failed attempts, and reading multiple blogs and watching several youtube videos, I finally came up with a delicious drink that strongly resembles an iced latte made with espresso!

Now, this can't be considered true espresso, because apparently there are strict guidelines for the temperature and pressure in order for it to be considered espresso, but this tastes pretty darn close. (in my opinion at least). The secret is to use freshly ground espresso beans, press the grounds tightly in the aeropress, and to add a filter on top of the beans (in addition to below the grounds). This increases the pressure needed to push the water through the aeropress, which I'm pretty sure allows it to extract more flavor.
The aeropress can be used to make more than just espresso. I think it was originally intended to make regular coffee. It just happens to be the perfect tool for making espresso :-). The great thing about it is that it takes up barely any space, it's portable, it's super affordable, it makes great coffee/espresso, and all you need is boiling water and coffee grinds. Two thumbs up.
So I wanted to share with you all, the how-to on making this perfect iced latte. Aaaand, the makers of the aeropress were generous enough to offer a free giveaway for one lucky reader!!! See below for how to enter!
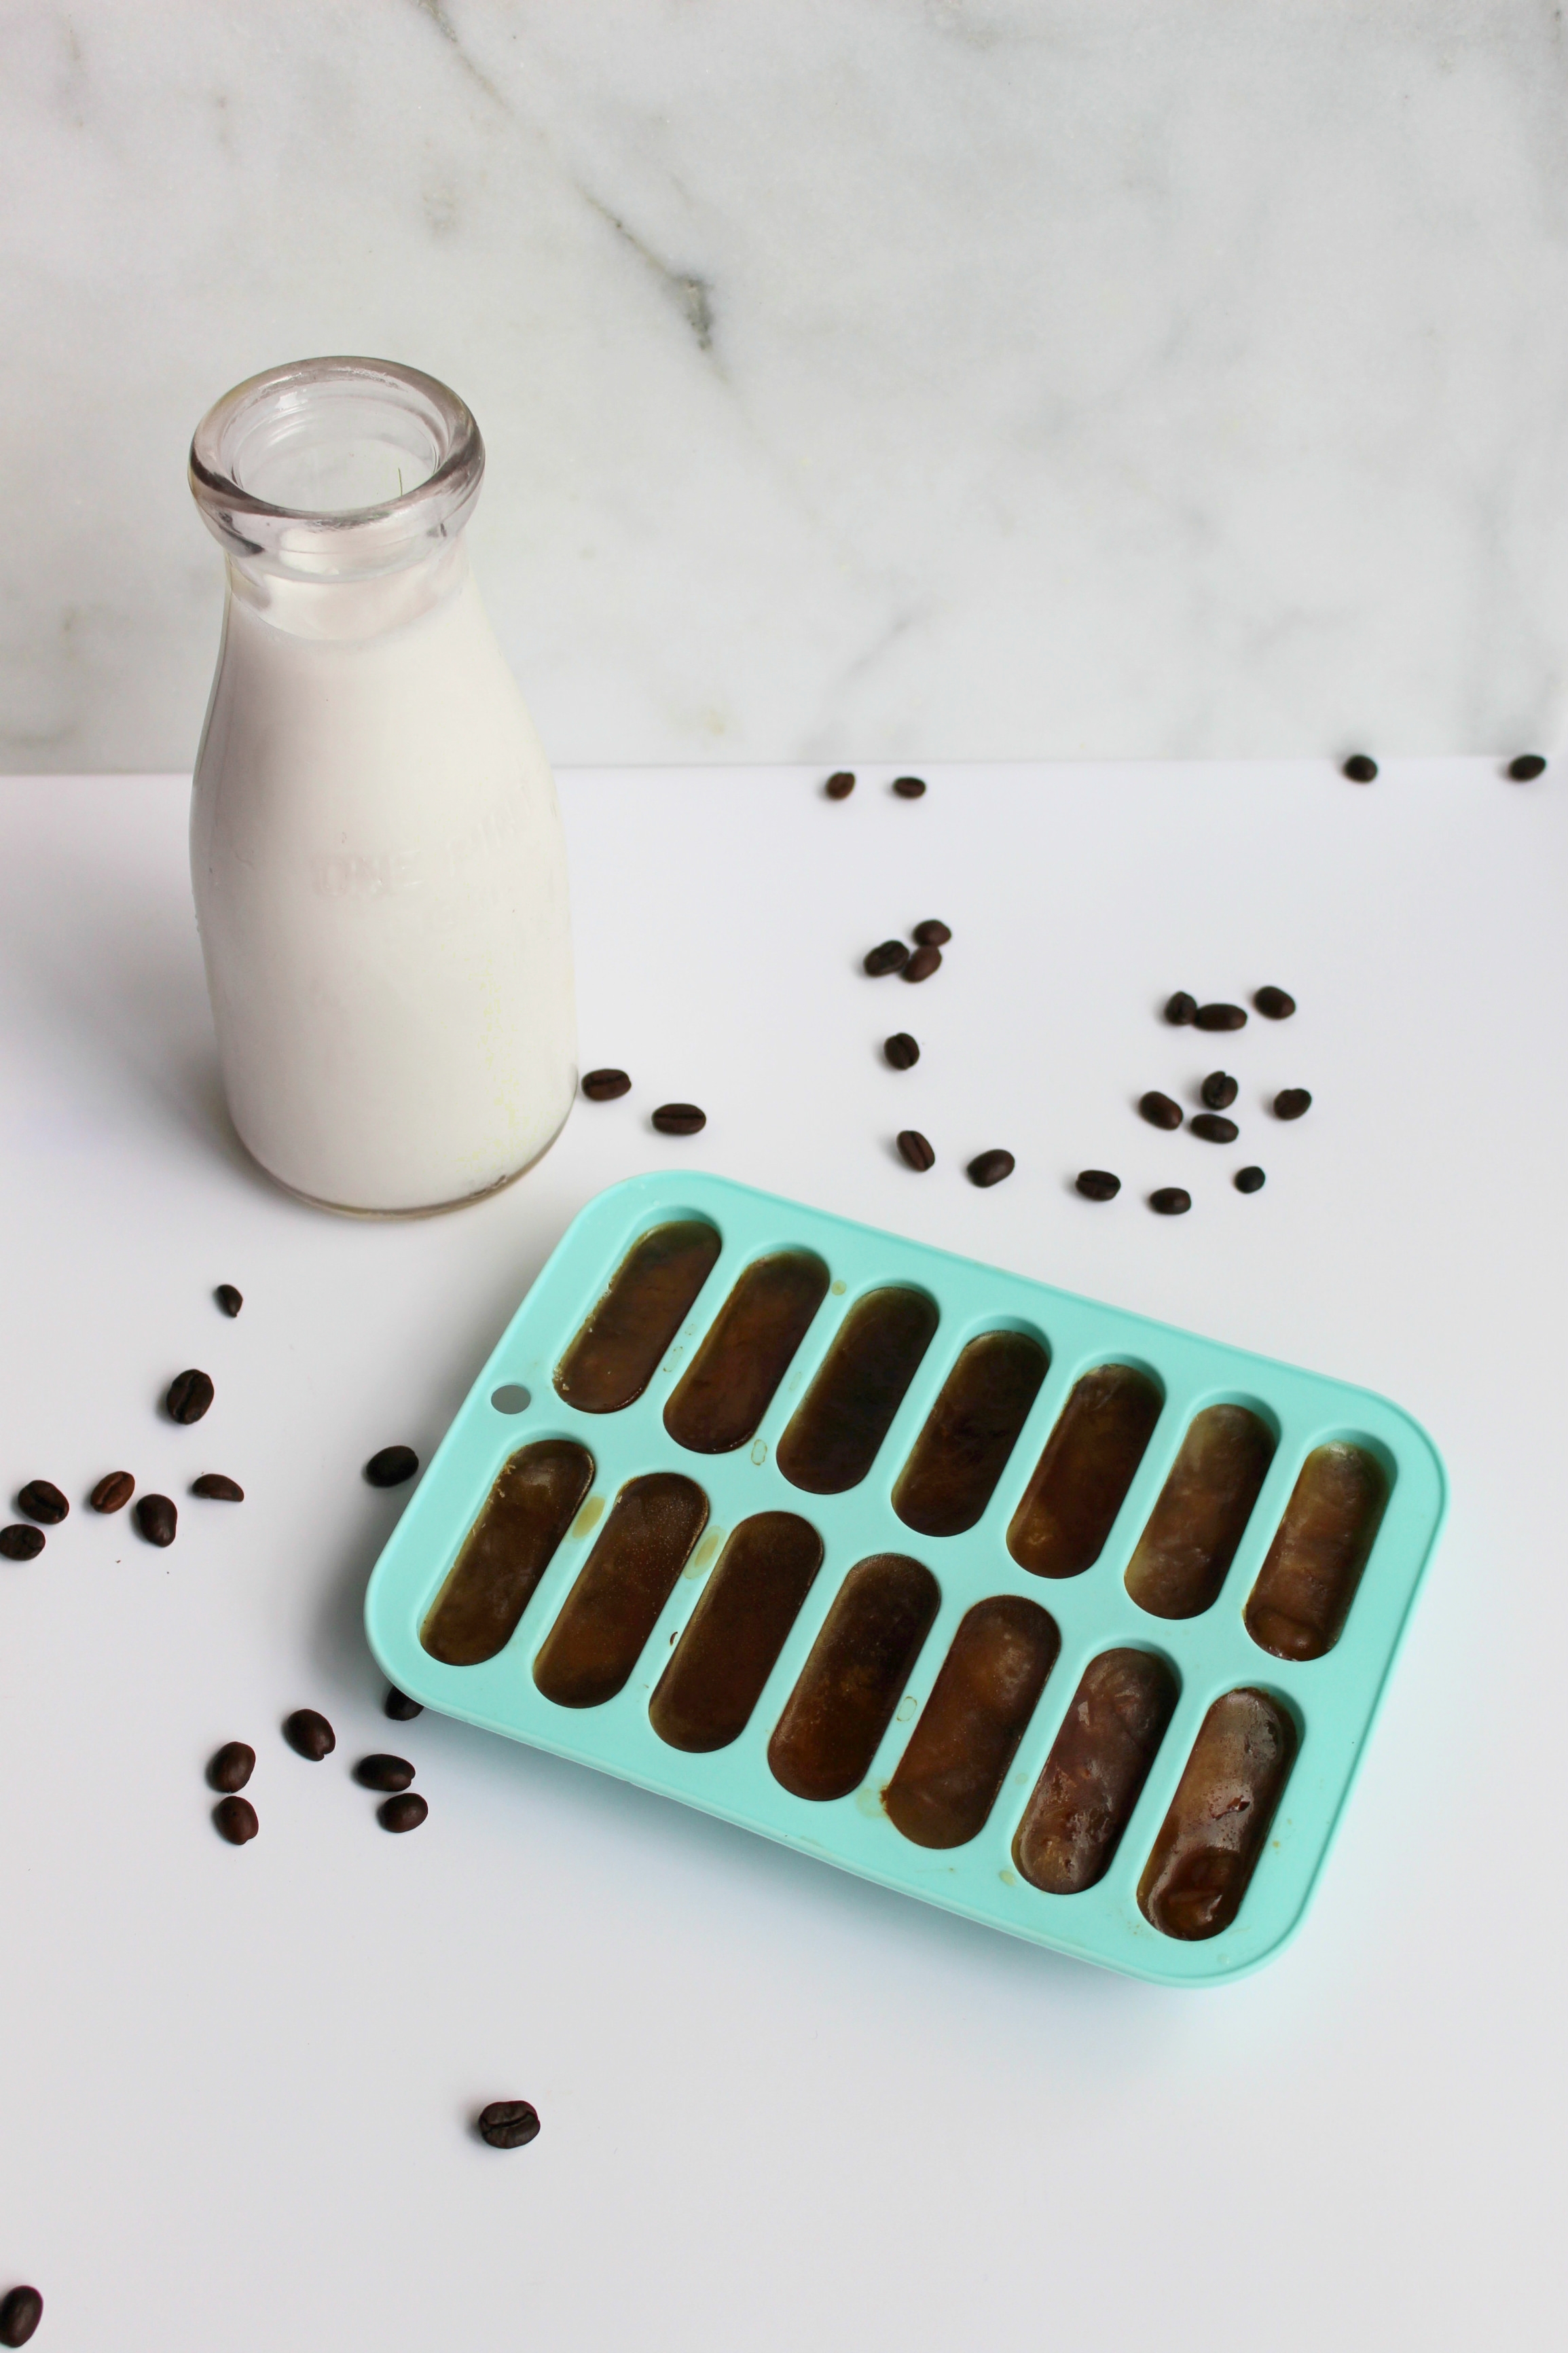
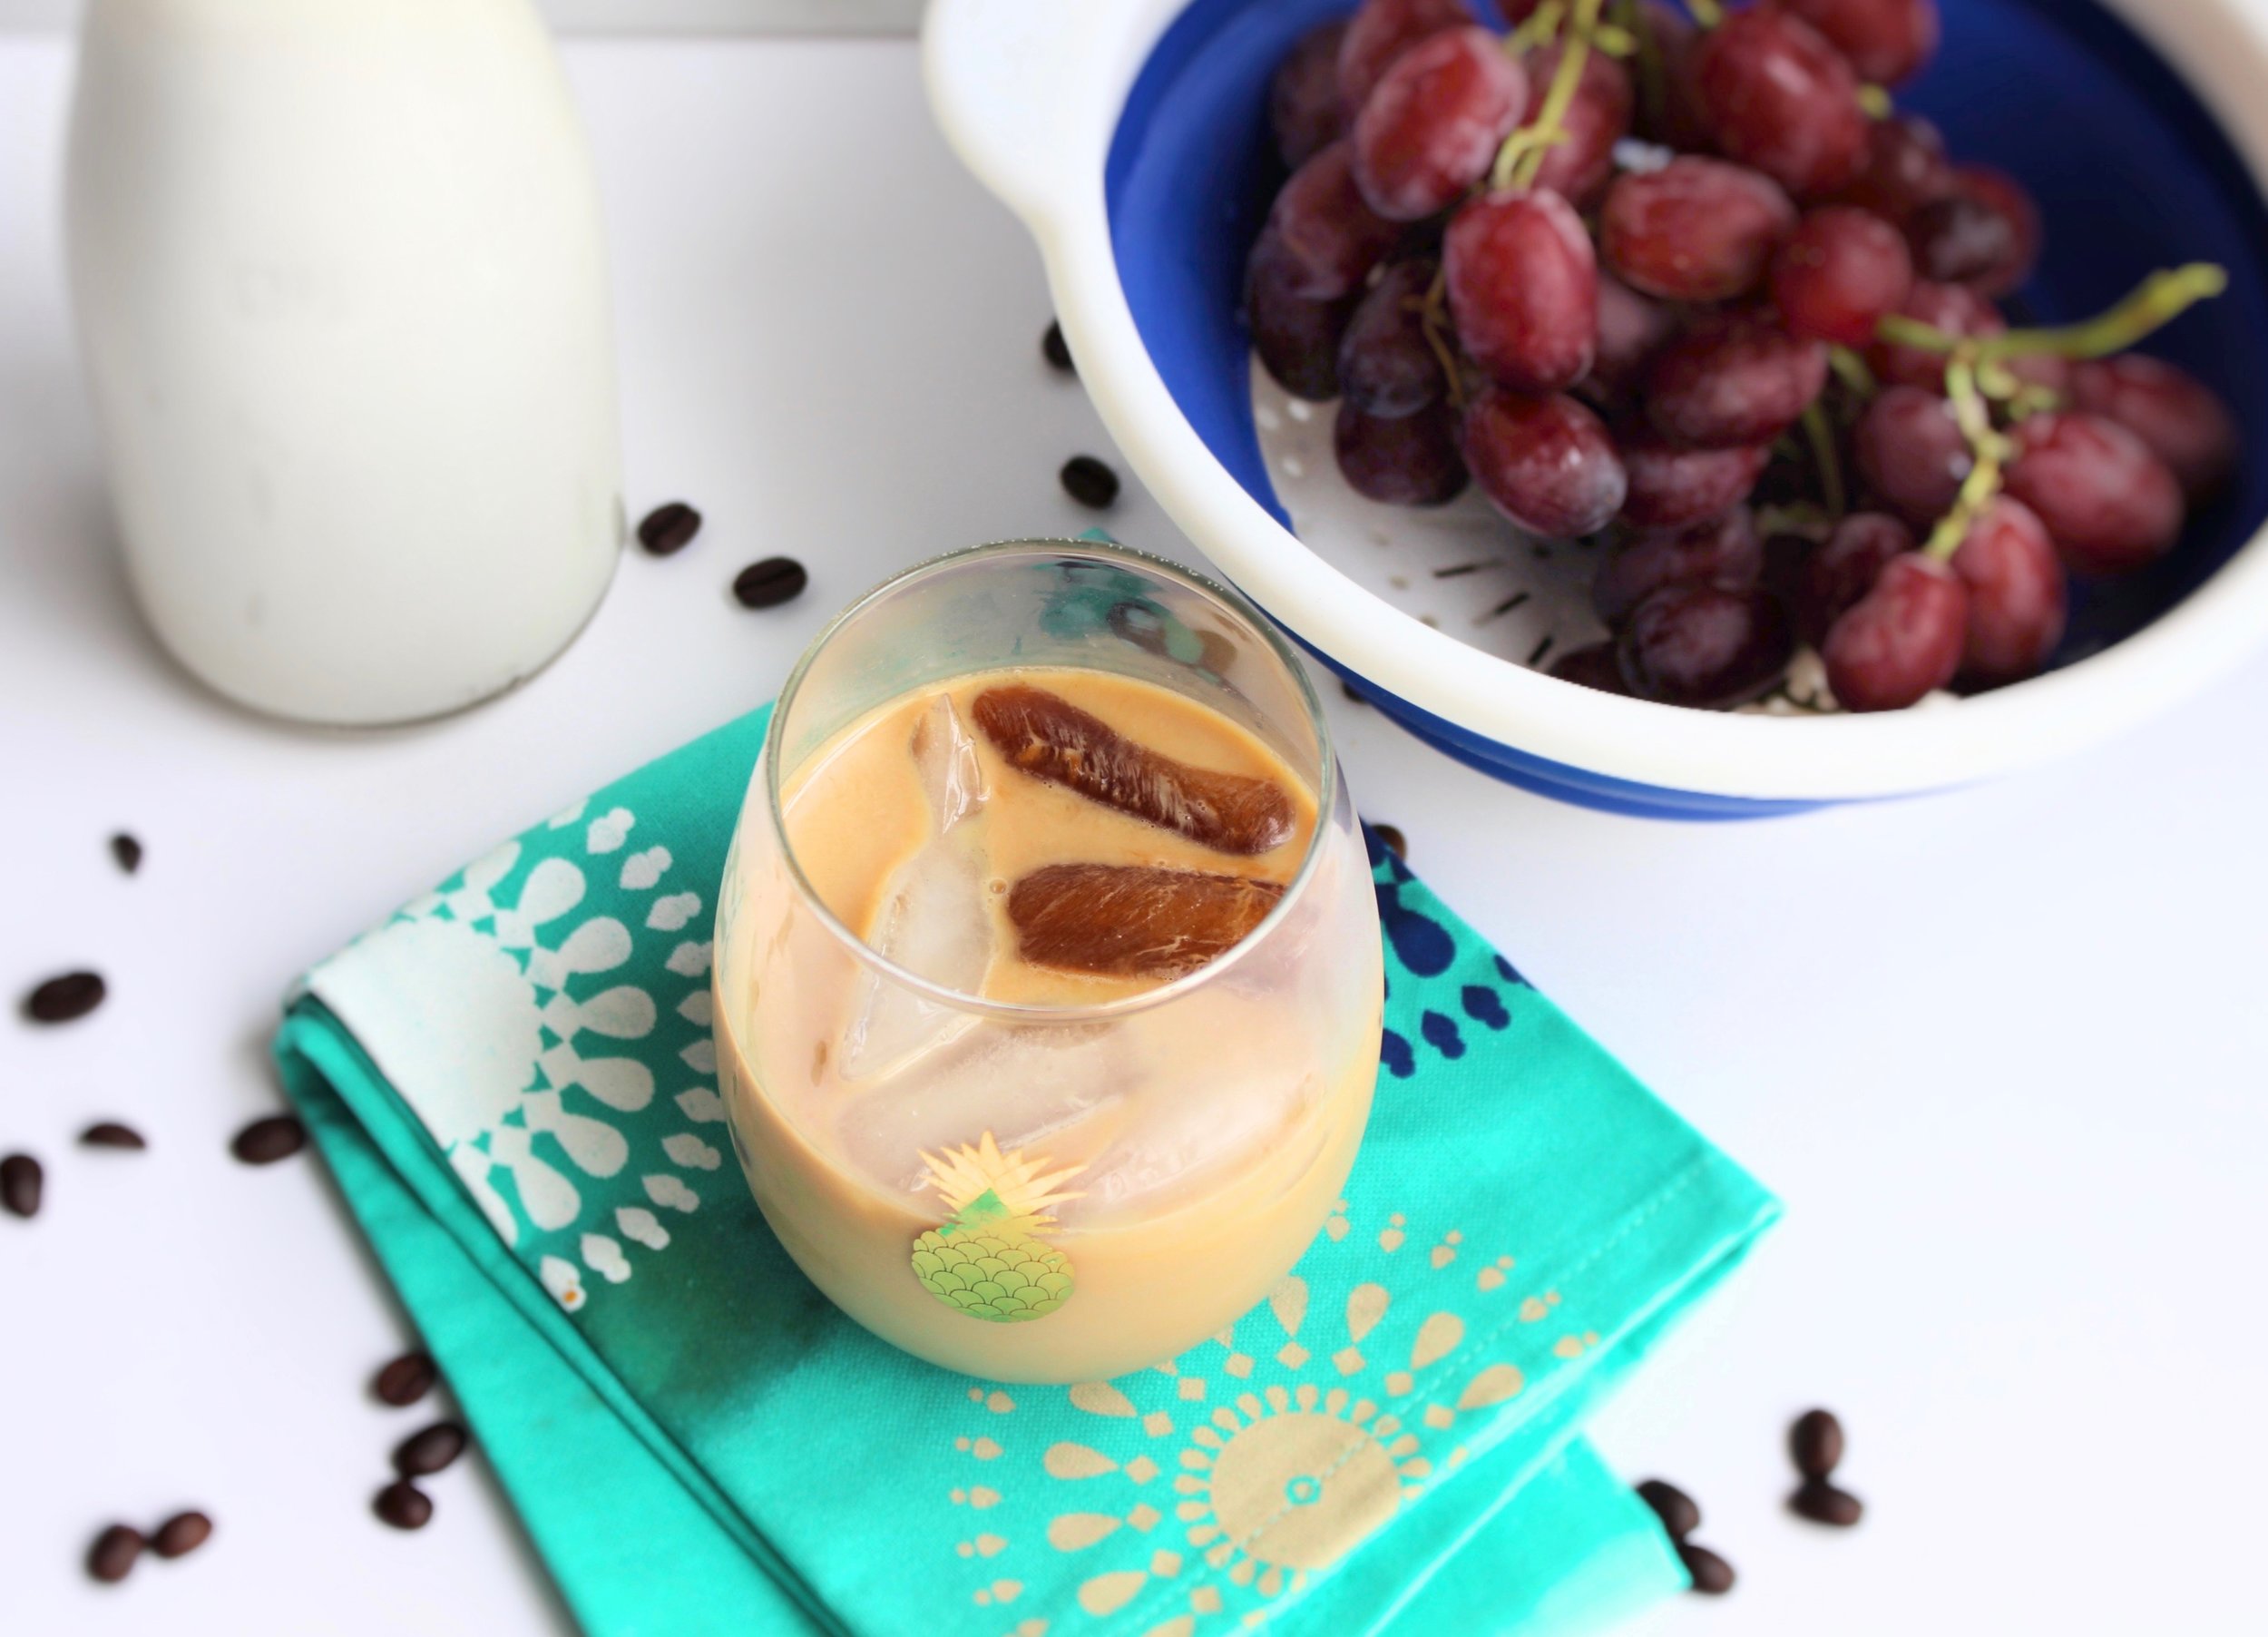
The first step is to make ice cubes made from brewed coffee. This isn't absolutely necessary, but I think it's much better because I don't like watered down iced lattes. I bought the ice cube tray in my picture on clearance at target. Isn't it so cute??
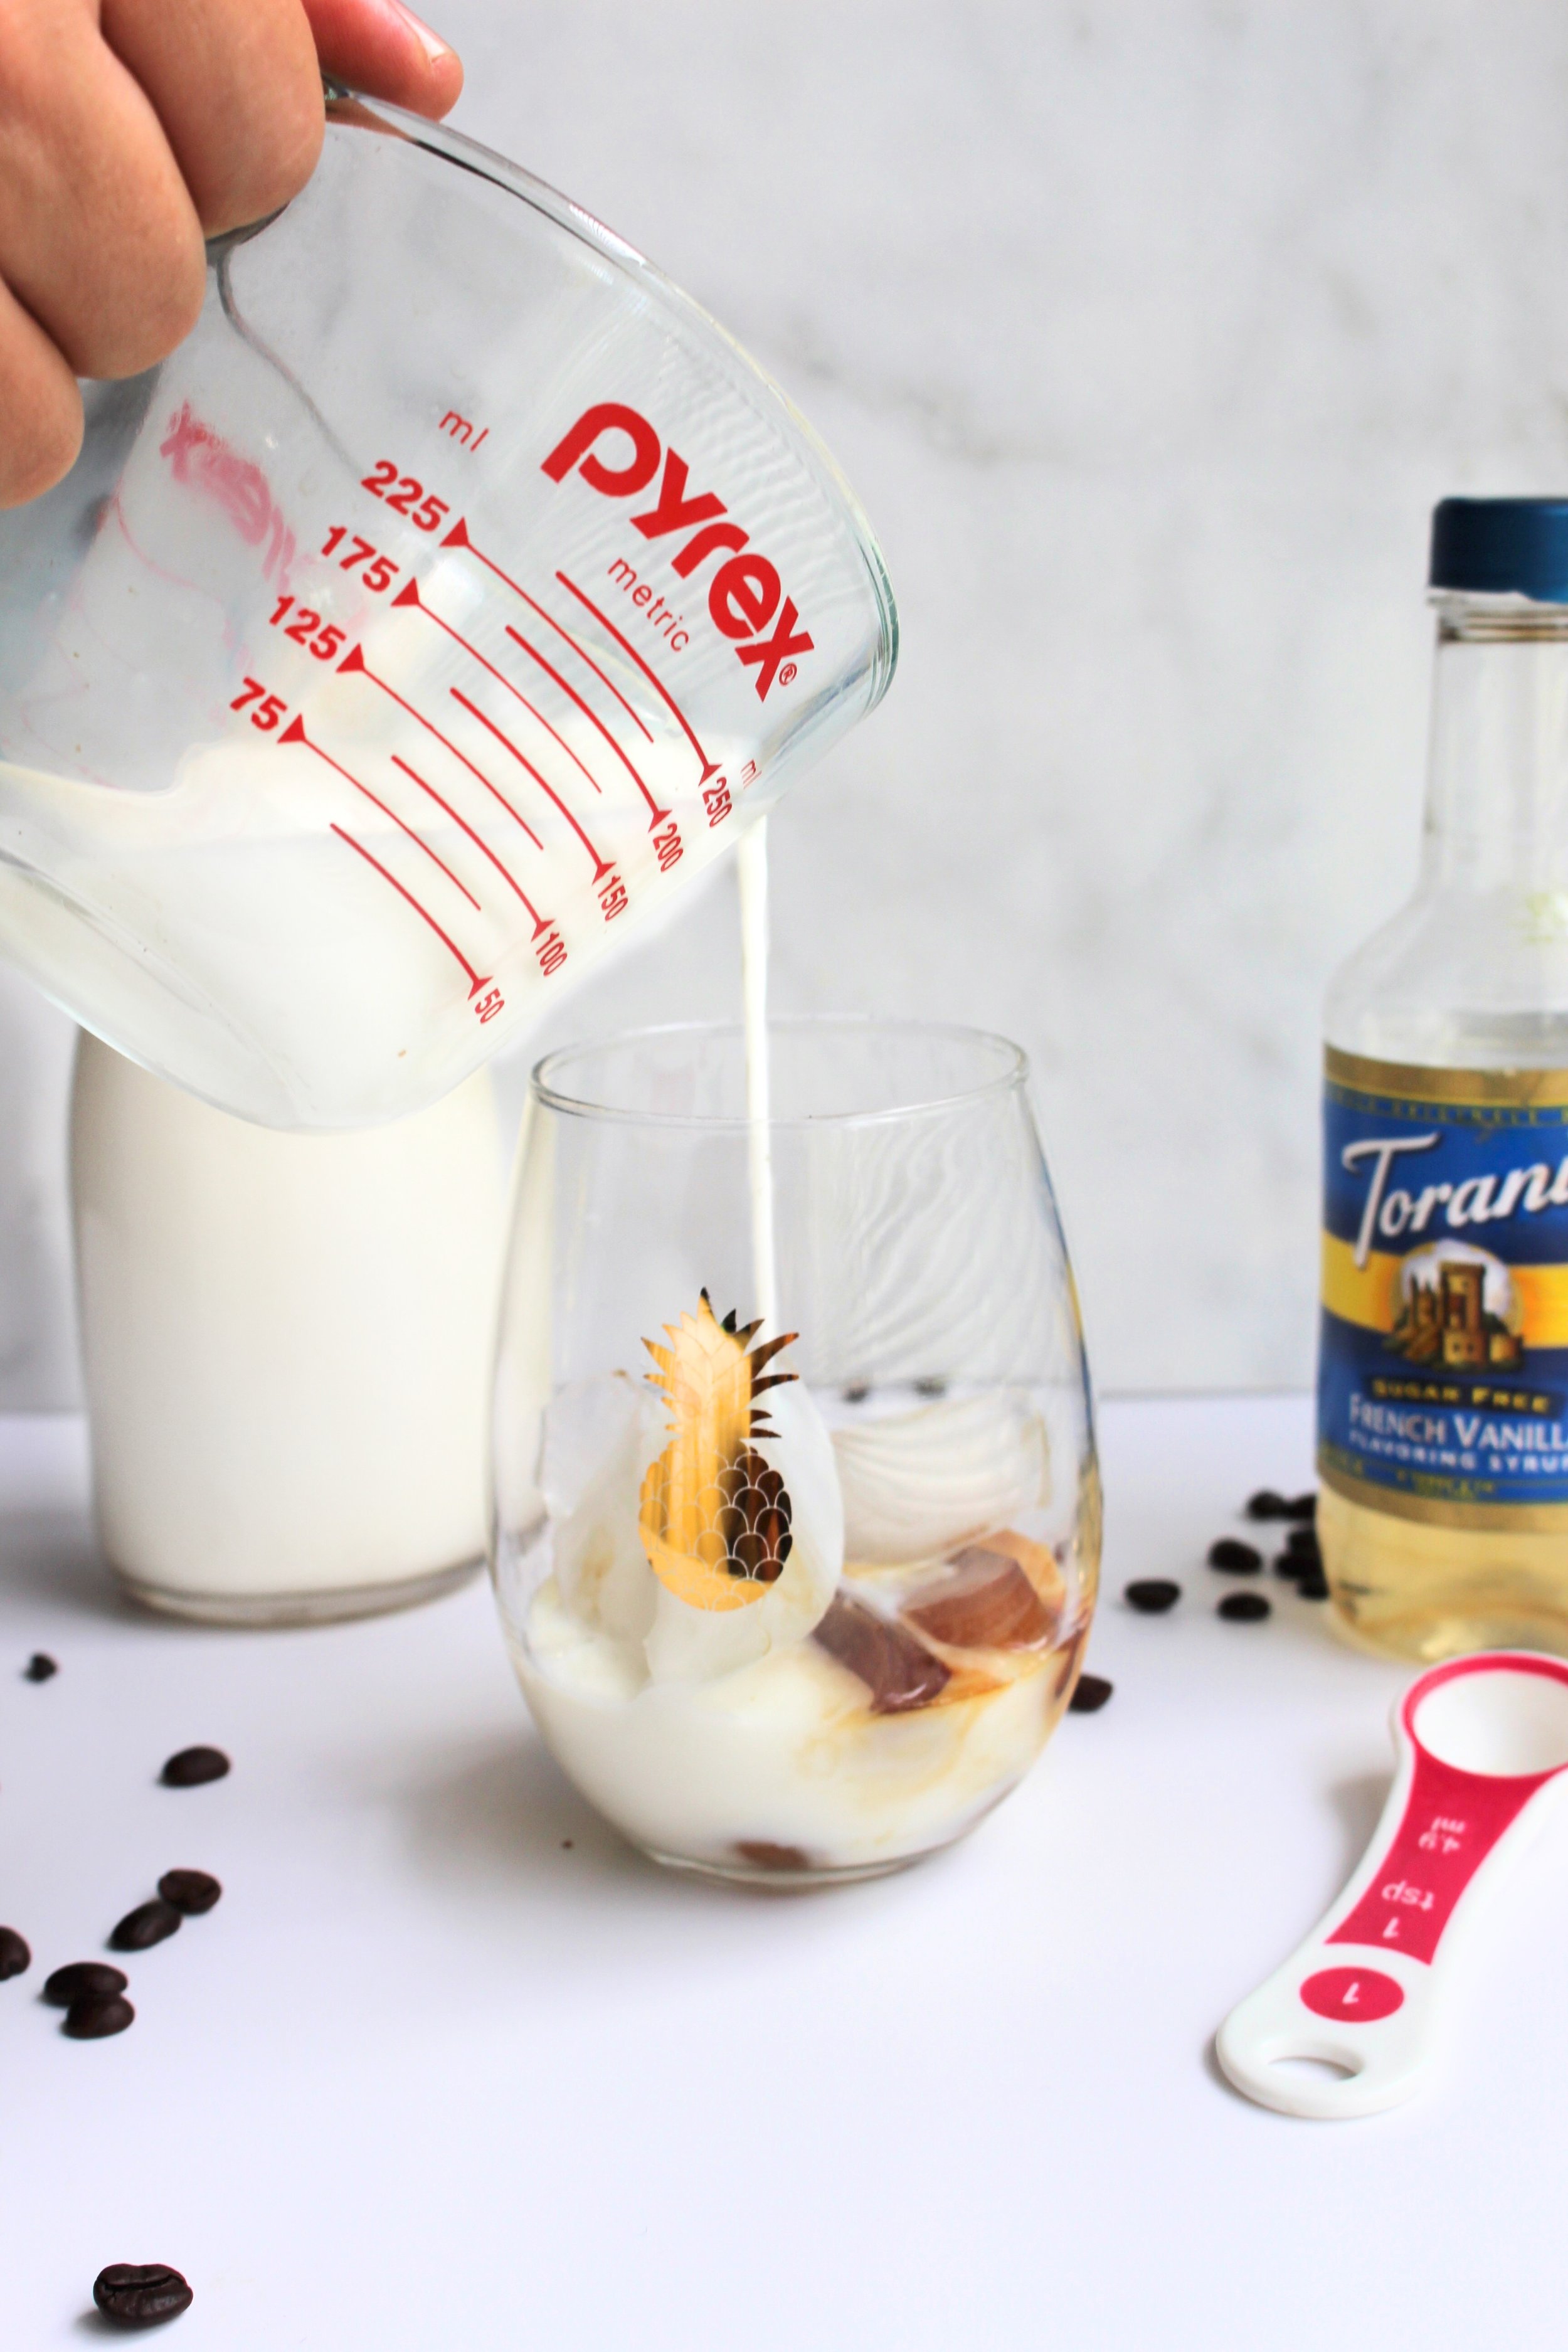
Once you have coffee ice cubes prepared, you're ready to get started. Pour 2/3 cup of milk into your cup and add 2 tsp of flavored coffee syrup. I'm personally a fan of vanilla, but you choose whatever flavor is your favorite. Oh, and go with cow's milk if you can handle dairy. It is waaaay better. Why drink something you don't even really like?! (I'm looking at you almond milk)...Then add a few coffee ice cubes and a few regular ice cubes. Place your cup in the freezer (that way your milk gets niiiice and cold).
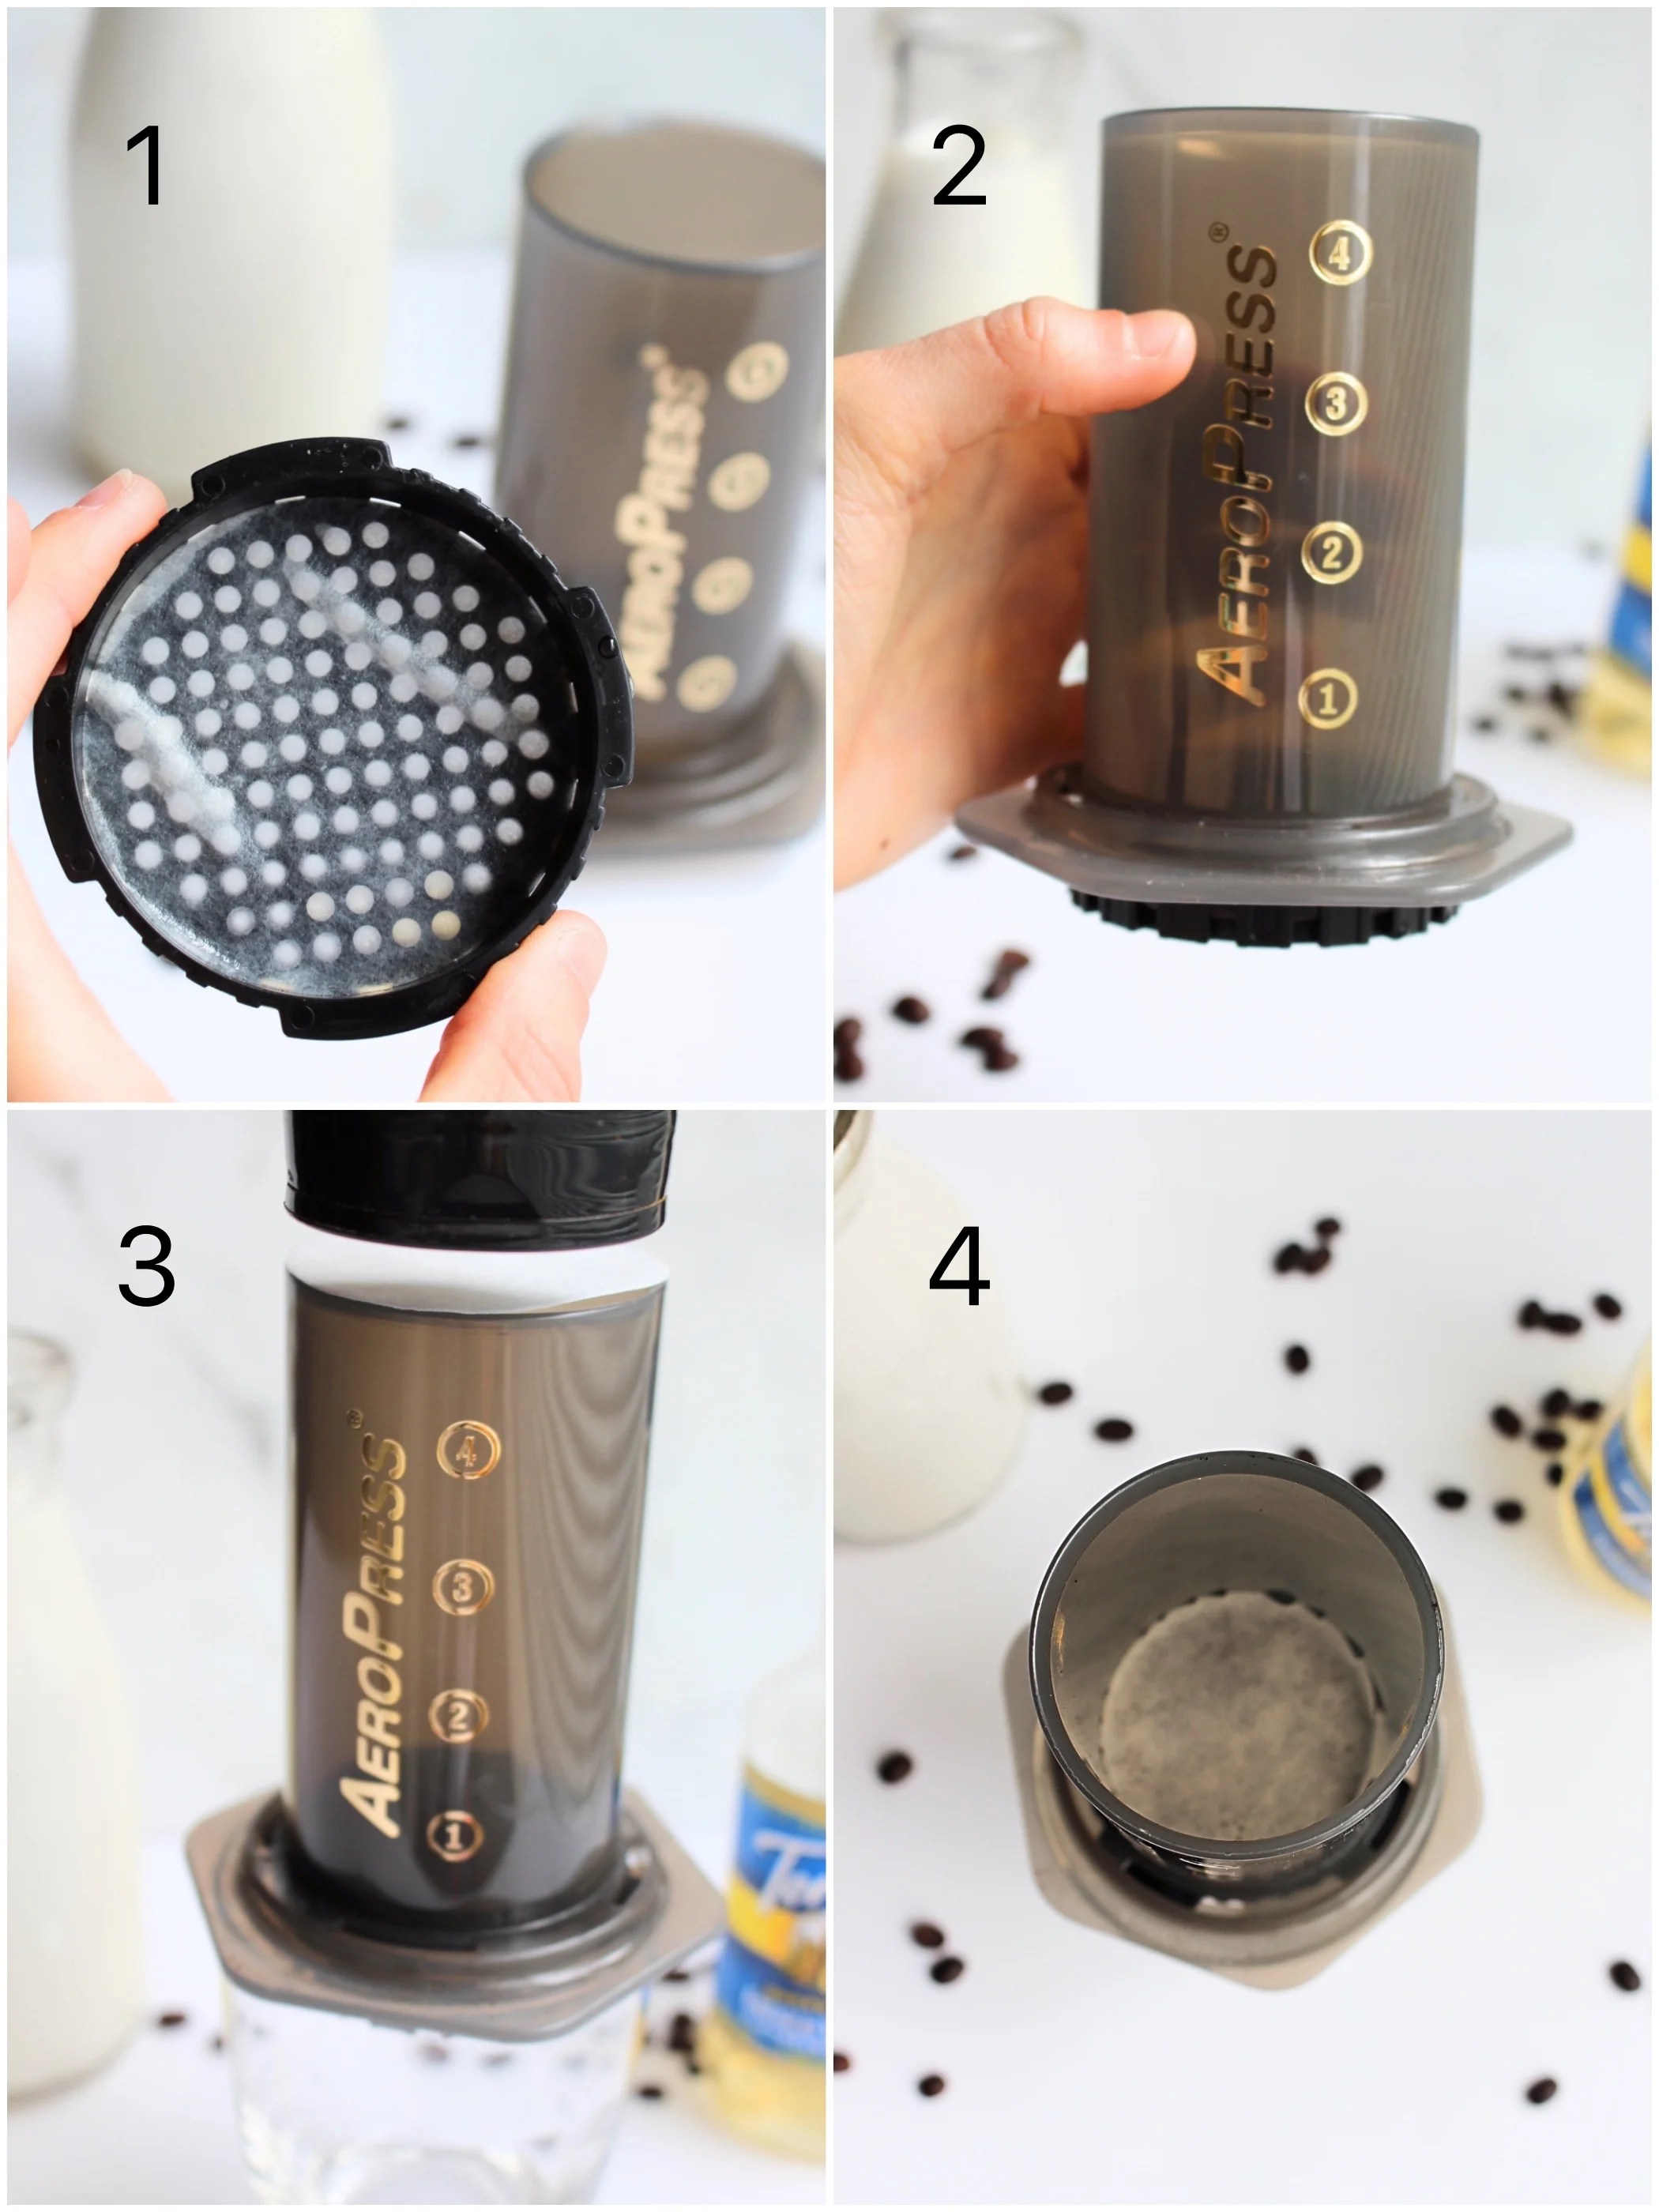
Next, set-up your aeropress. Place a paper filter in the black filter basket and wet with water. Screw it onto the bottom of your aeropress.
Grind your espresso beans finely with your coffee grinder. You'll need the equivalent of 4 cups, which is 1/4 cup finely ground espresso beans, or 16-17g. Place your grounds into the areopress.
The next step is to place another filter on top of the grounds and to press it down firmly. Be sure to shake the aeropress a little before you tamper it down so that the grounds are even. I use a spice bottle to press the filter and grounds down because it happens to be the perfect size in diameter and length. Now you're ready to make your espresso! (see picture above)
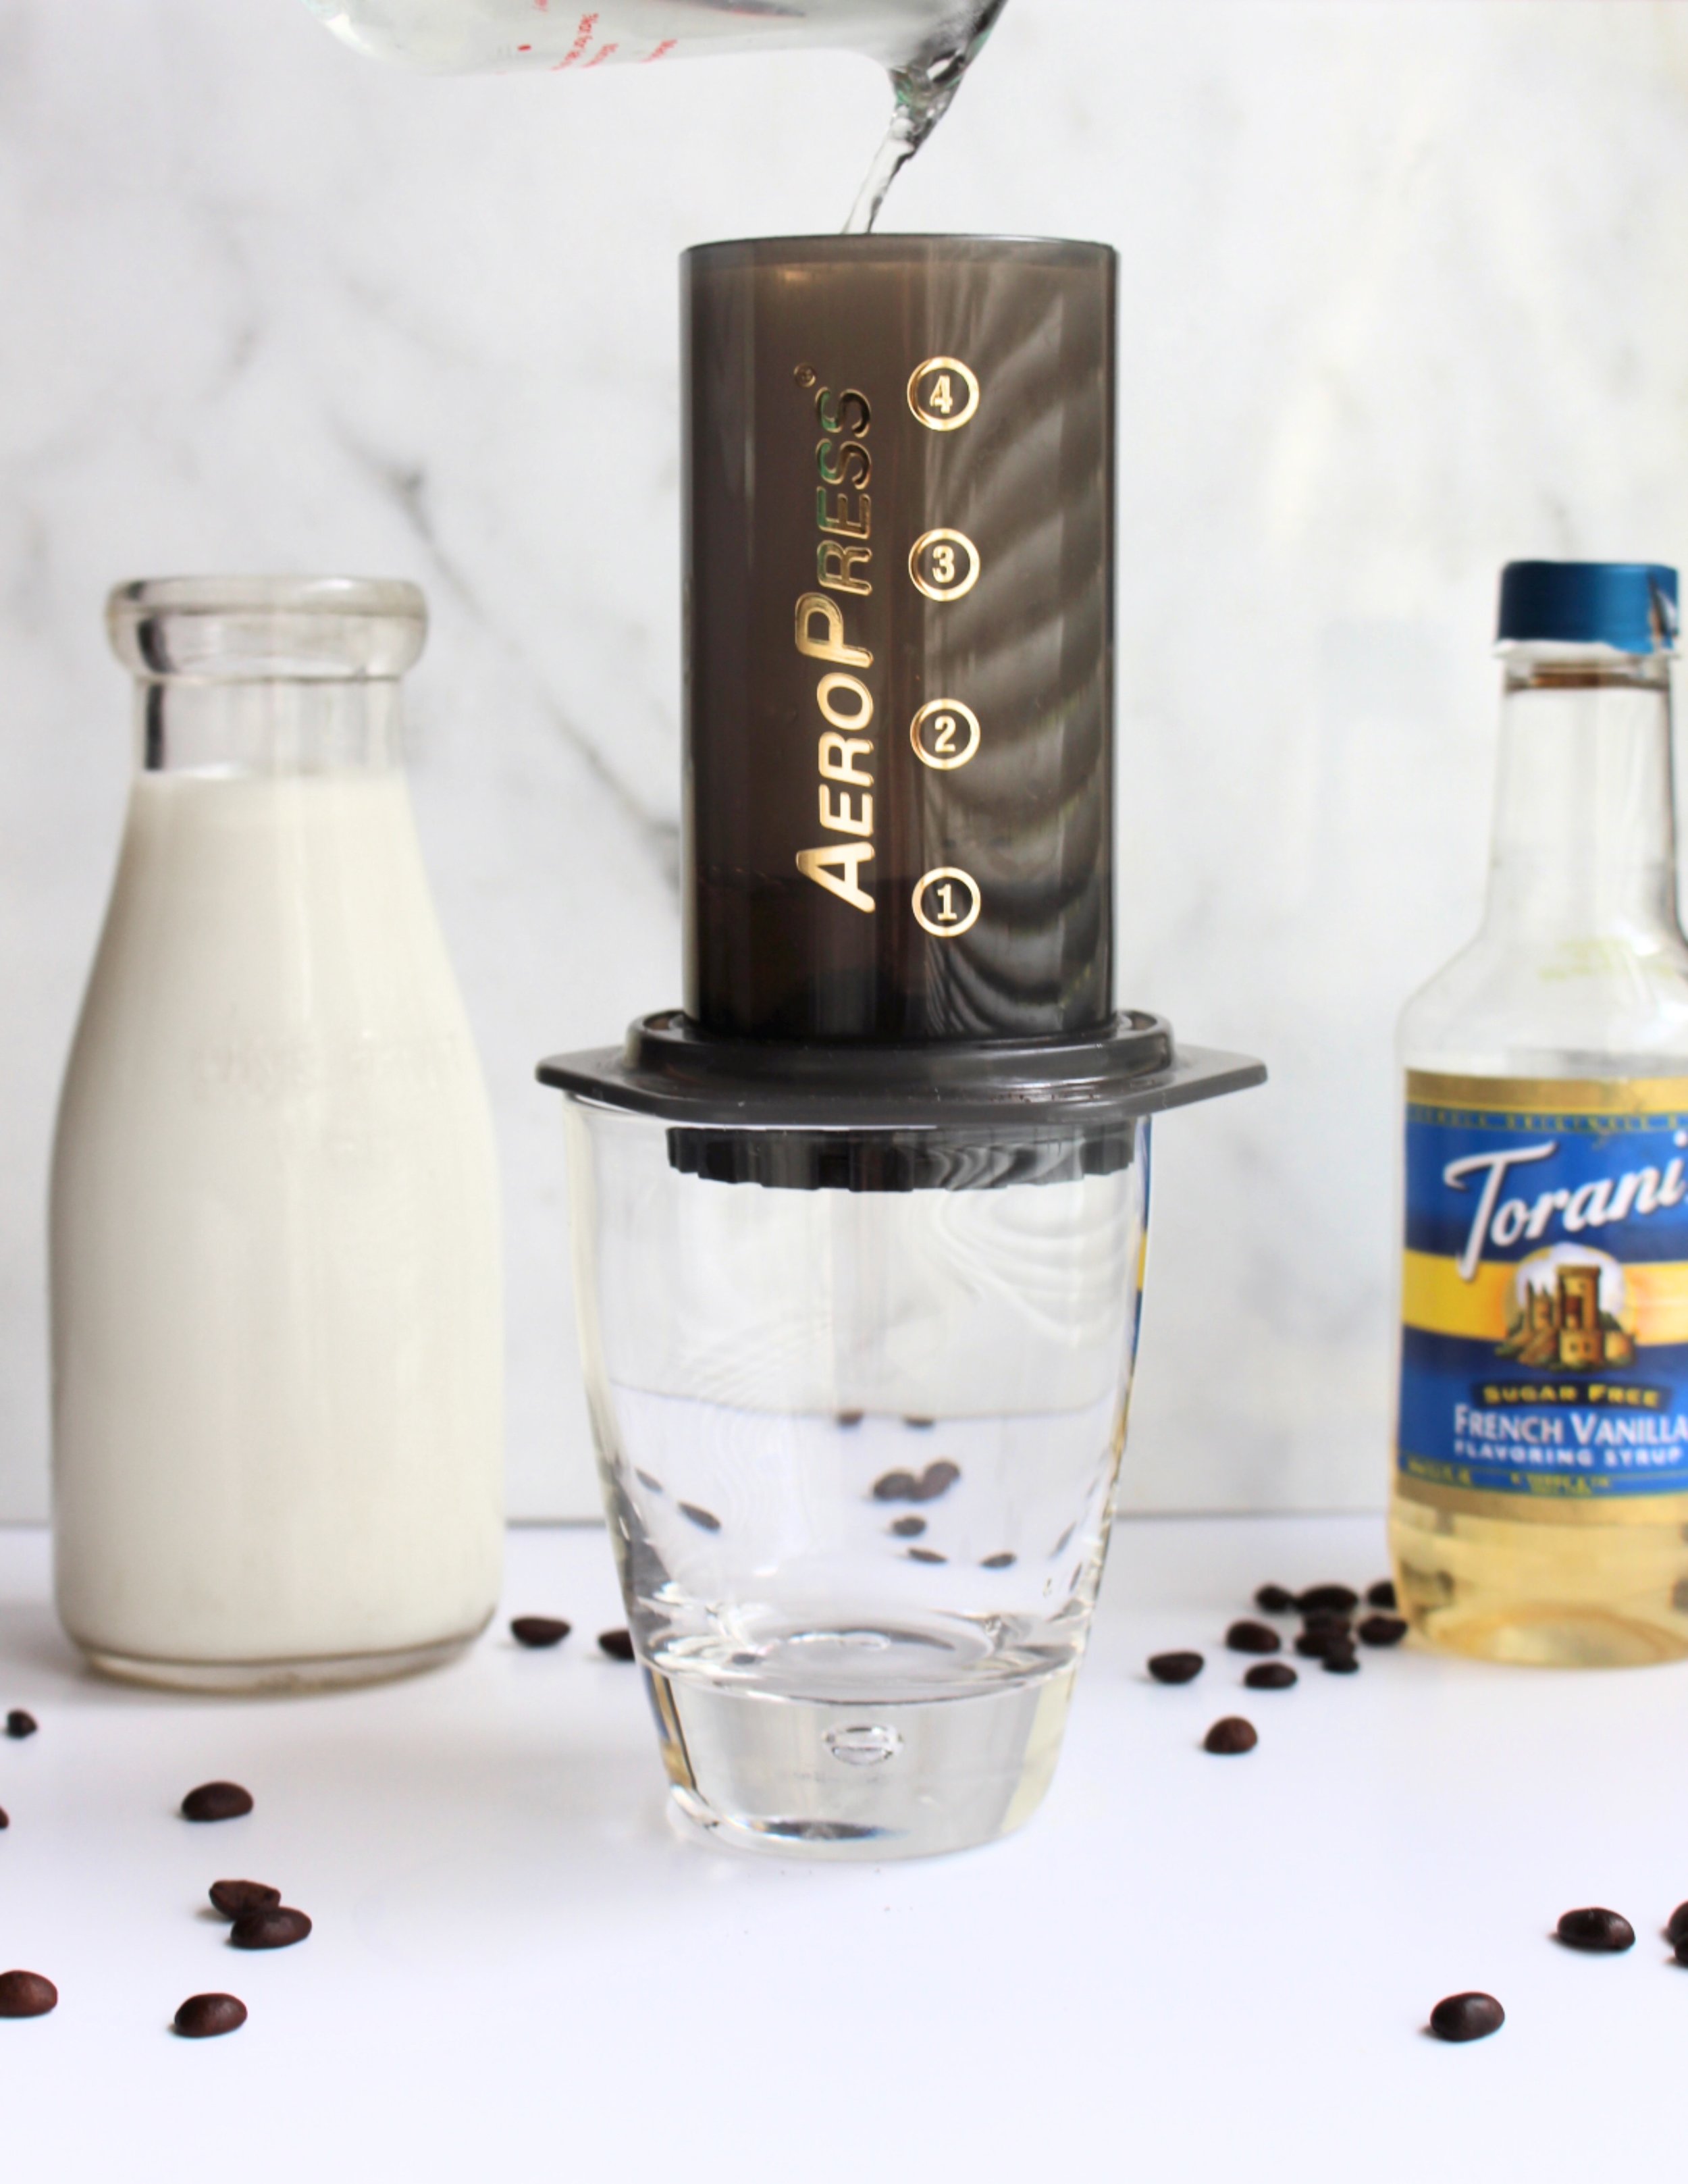
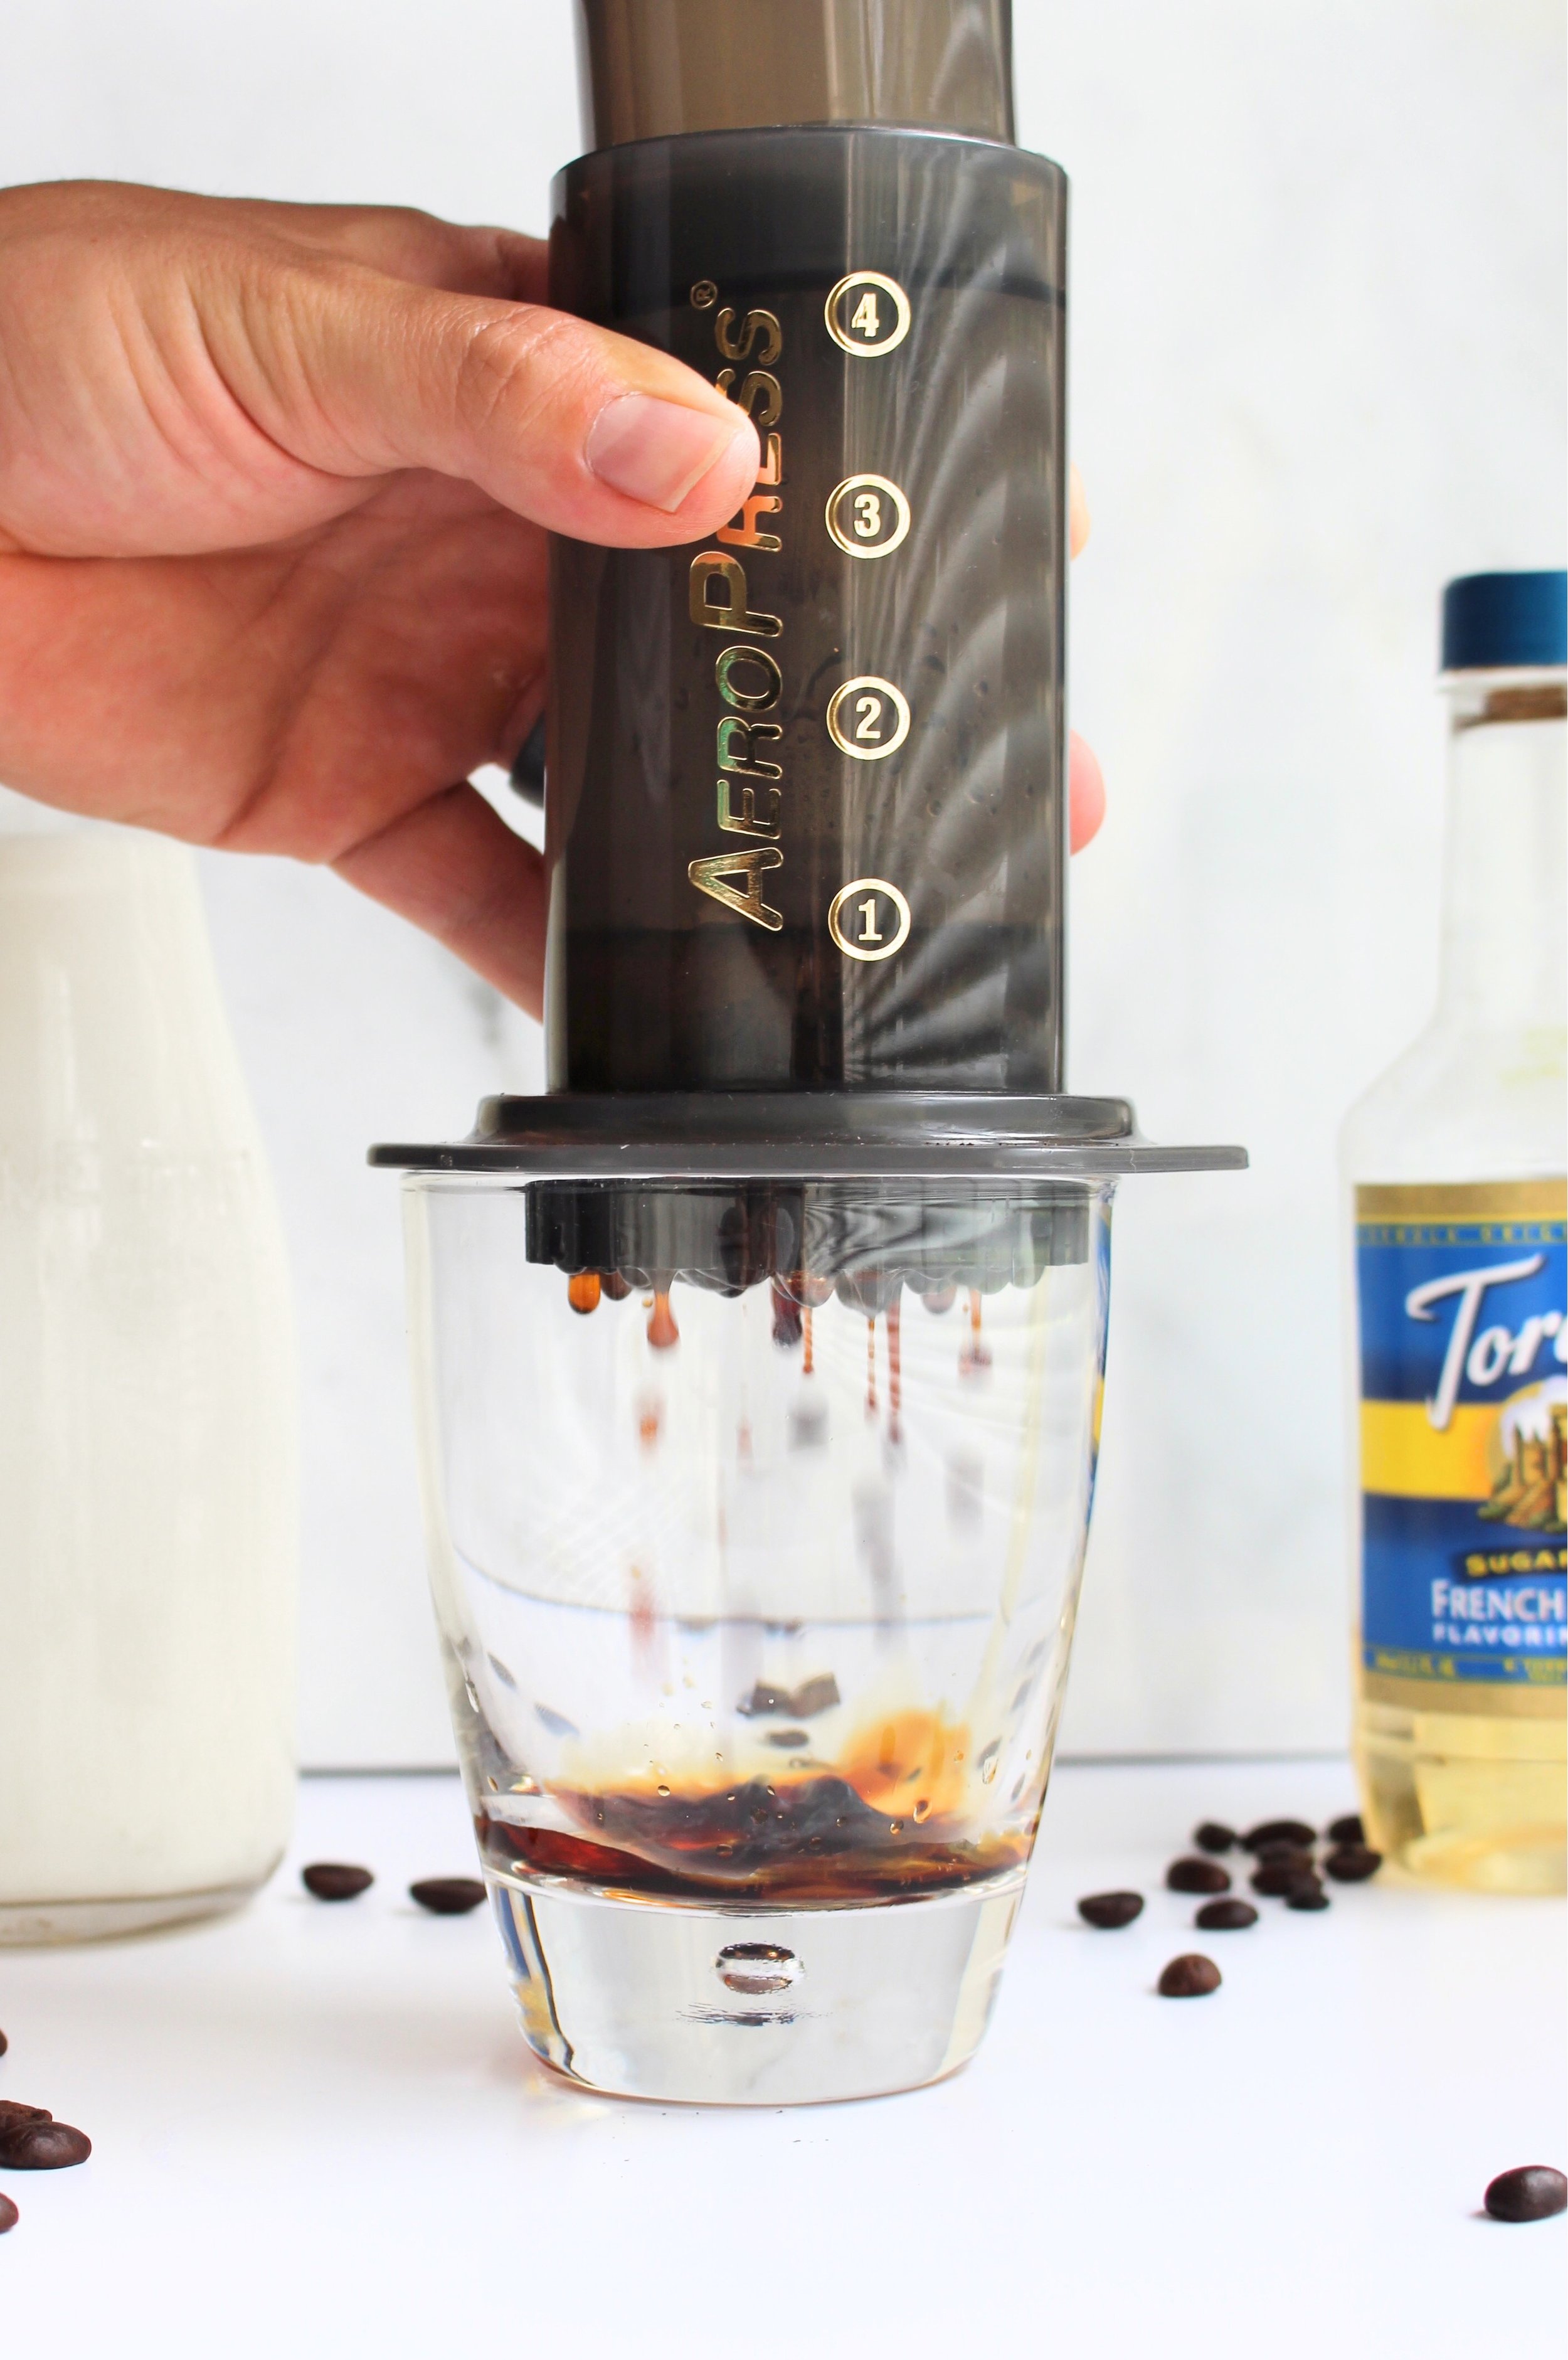
Boil 1/3 cup water and add to your aeropress. Place the plunger in and slowly press down until you reach the bottom. You will hear some hissing. I've read instructions that say to stop when you hear this, but I've had better luck pushing until I hit the bottom. I've been able to almost get a crema doing that.
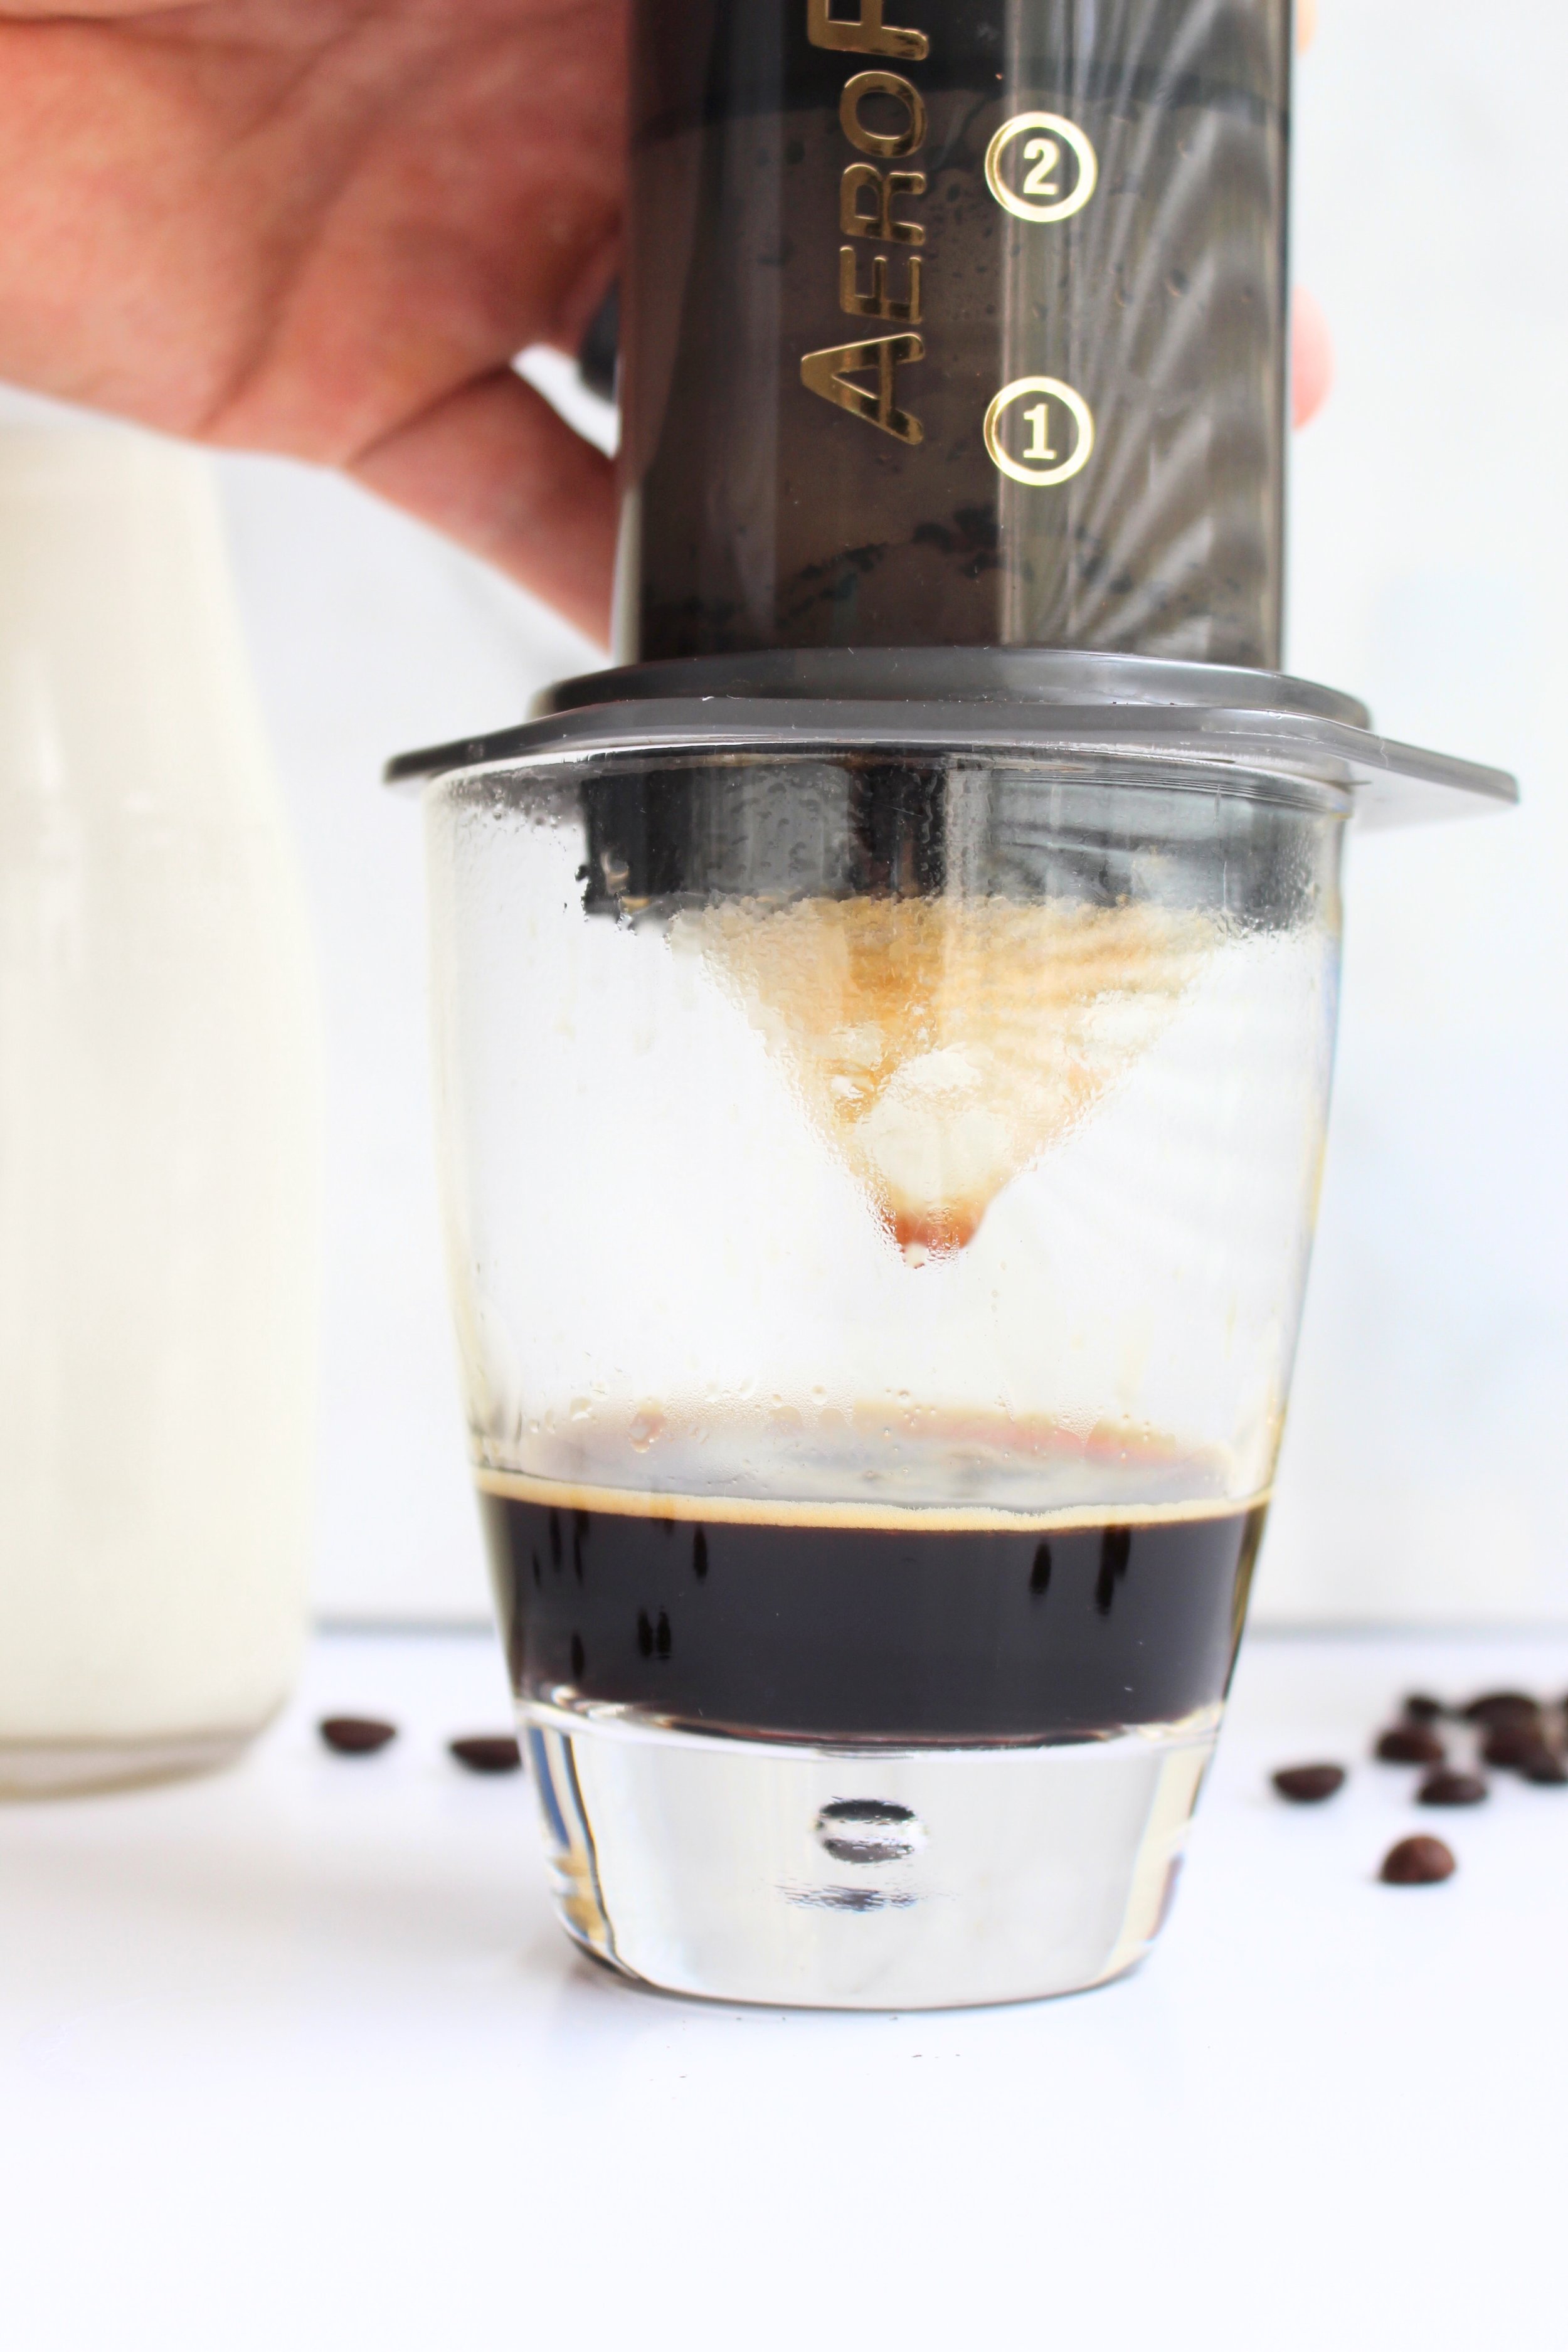
Congratulations! You have just made a shot of espresso!!! Add to your cold milk, stir, and enjoy!!! Just an FYI, if you want a hot latte, just heat and froth your milk before adding the espresso instead of chilling it. It's delicious that way too. :-)

Gosh, I just think the coffee is just so beautiful! Don't you agree??...I know, I'm ridiculous. As far as the giveaway is concerned, the drawing begins today and ends Sept 26 and you can enter two different ways. The first way is to comment below with your favorite coffee drink (make sure to put your first name and last name initial). The second is to find my instagram giveaway post and comment by tagging a friend! I will be drawing and contacting one lucky winner Sept 27, so keep an eye out.
Can't wait to hear what you think about the final product. I hope you love it as much as I do! I'm sure your budget will :-)