
Finally...My kitchen remodel reveal (well, sort of)
So. This is long overdue. I promised pictures of our kitchen reveal a LOOONG time ago. But if I’m honest, I’ve been putting it off—embarrassed that it’s still not done. I wanted perfectly curated photos that belong in a magazine. But after “working” on it for over a year, our kitchen is still not finished. It’s been functional for quite awhile, but there are a lot of last finishing touches that need to be done. Despite it not being fully finished, I’ve decided to post these pictures with the hope of sharing a final reveal in the next few years (I say years because we aren’t planning on replacing our appliances anytime soon—they work, so we will be content with function over aesthetics). Reality doesn’t always line up with expectations, and that’s okay.
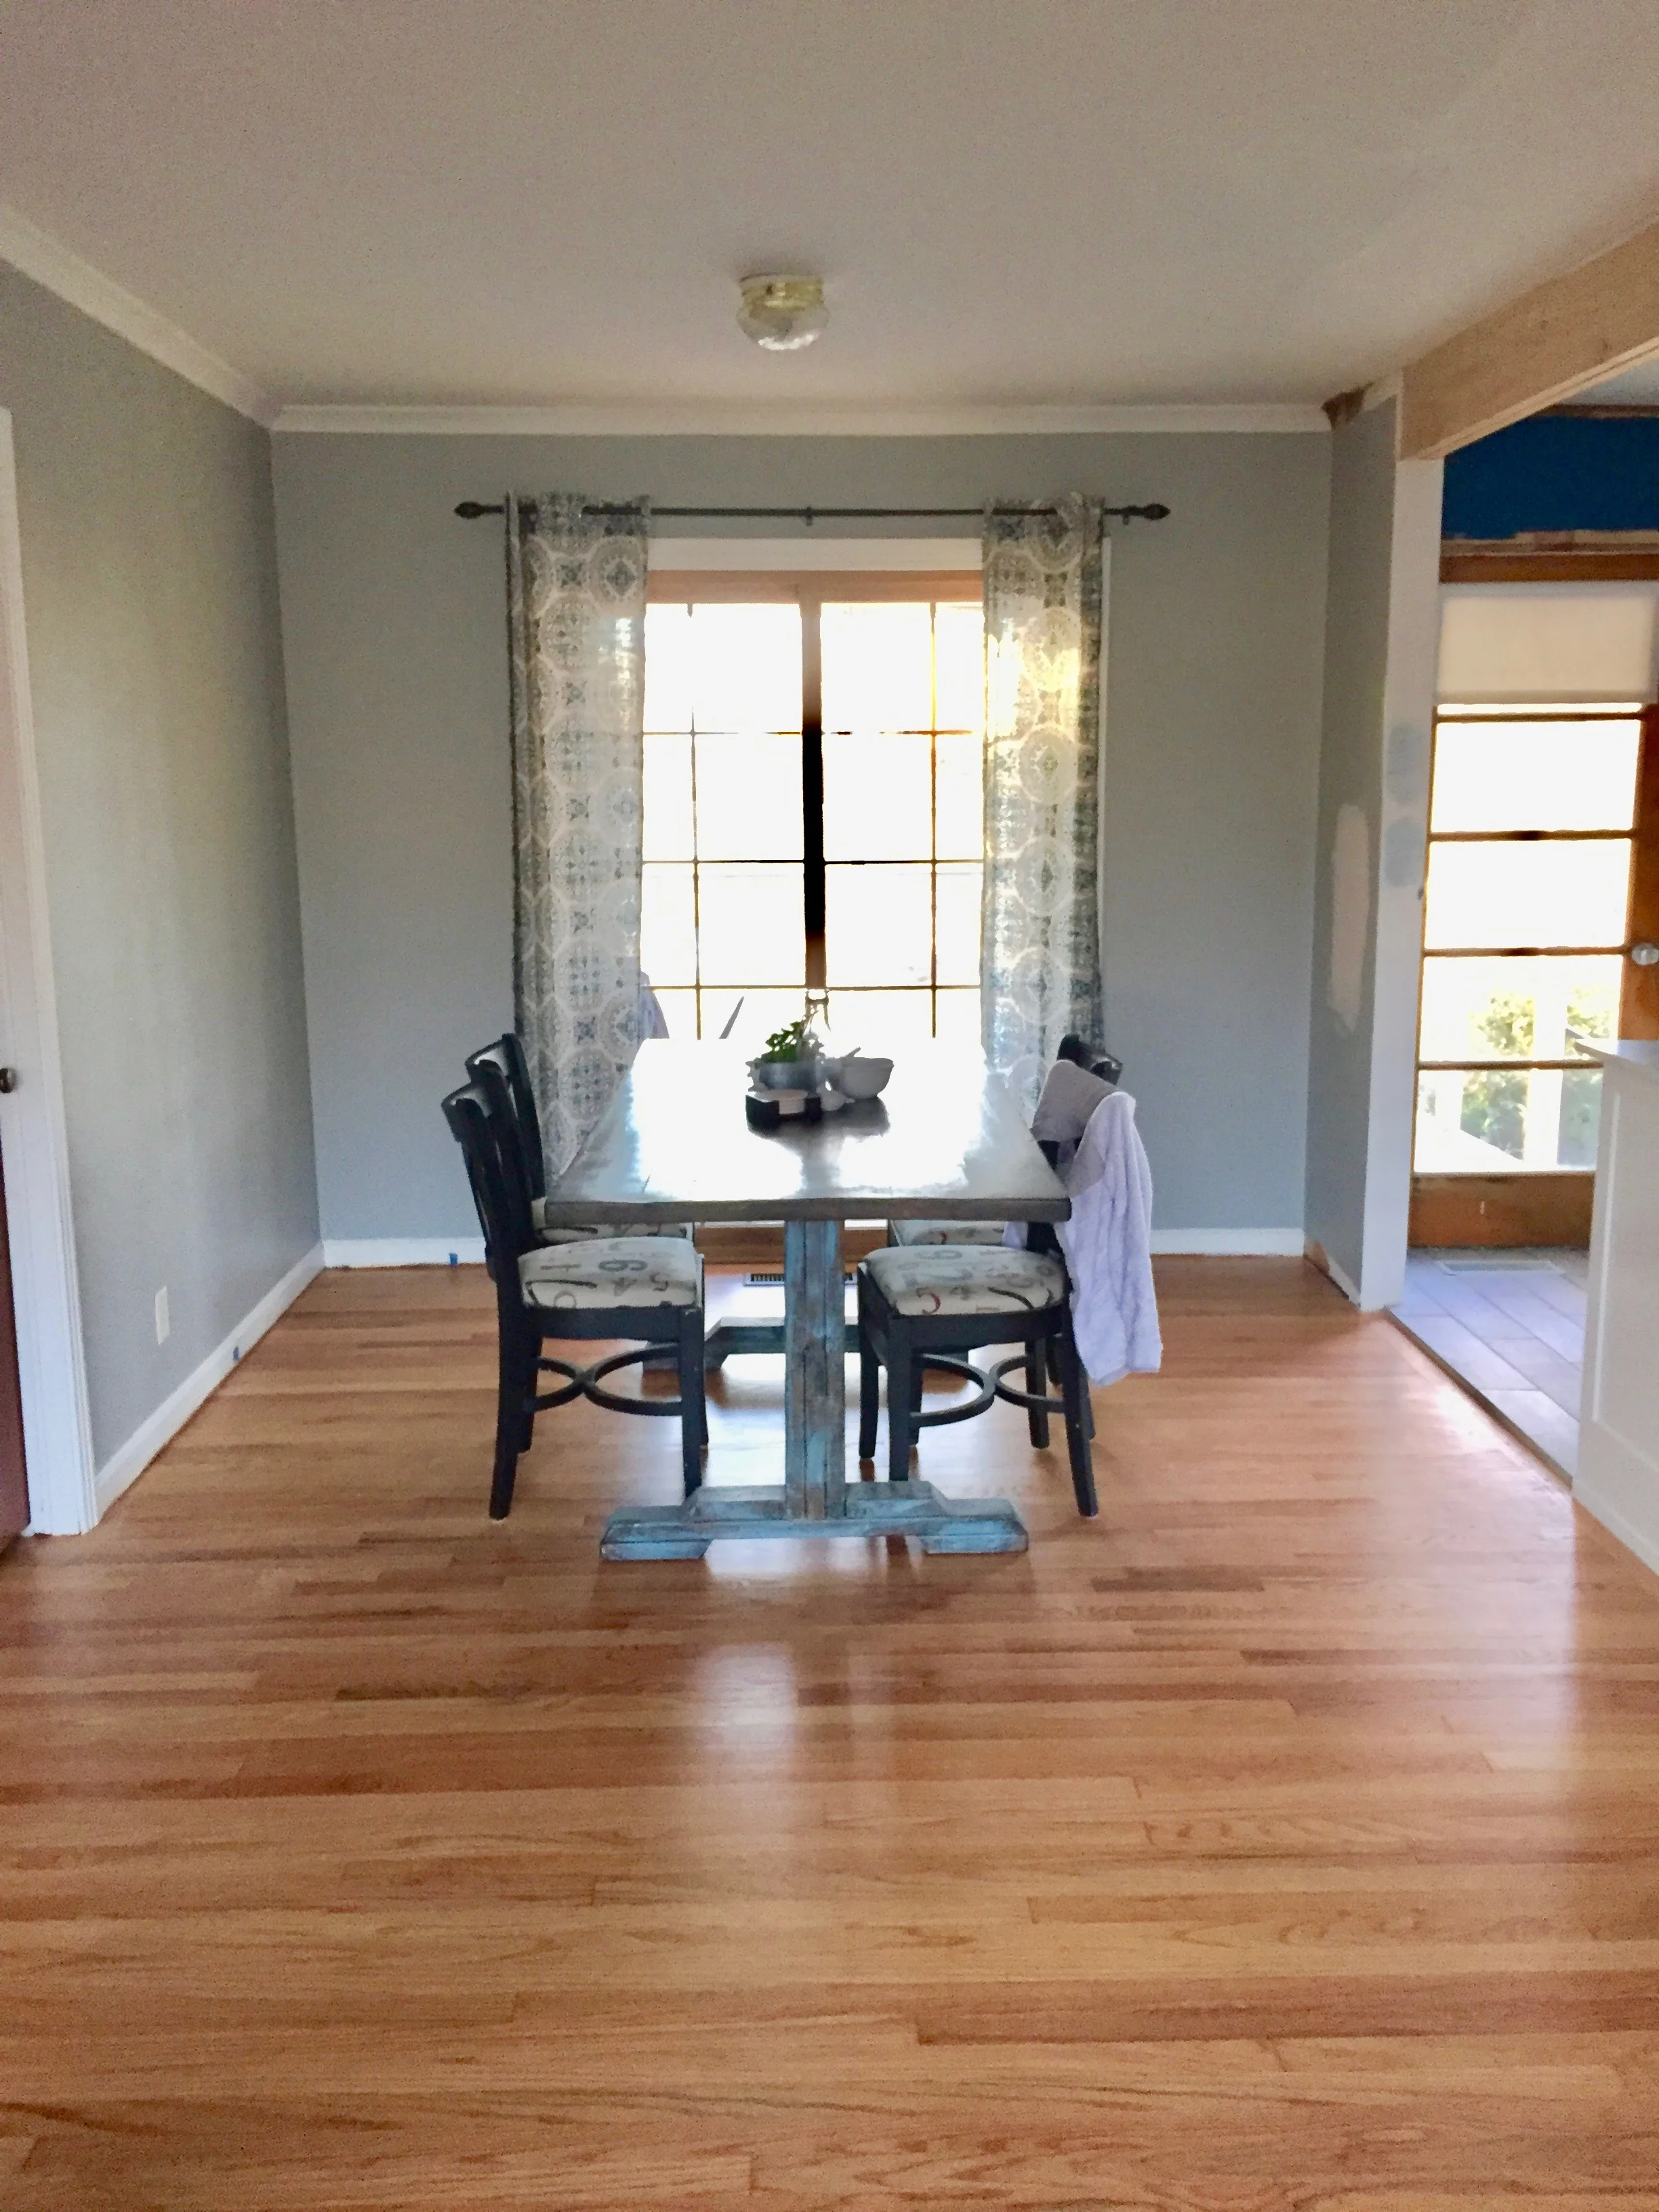
We bought our house September of 2016 after living the apartment life for 3 years and saving for a down payment. We bought our house with GRAND dreams for renovating. I had NO idea how much hard work went into redoing a house. Before moving in, we sanded the floors because of a massive stain in the dining room (which was conveniently covered up by their dining table), hired a flooring guy to replace the stained woods and finish the remaining house 😂(do yourself a favor and don’t try to redo your hardwood floors—leave it to the professionals!), sanded all of the trim, painted all of the trim white, painted the closets, installed lights in the living room and kitchen (WHAT a huge difference!!), tore down the wall between the kitchen and dining room and put in a header (unexpectedly) to said wall that was torn down. It was a lot. We were spending every night after work working on the house. By the time we moved in (which was a miracle that it was moveable), we were exhausted and tired of working on the house.

BEFORE: the kitchen is through that door

BEFORE: dining room and kitchen to the right

BEFORE
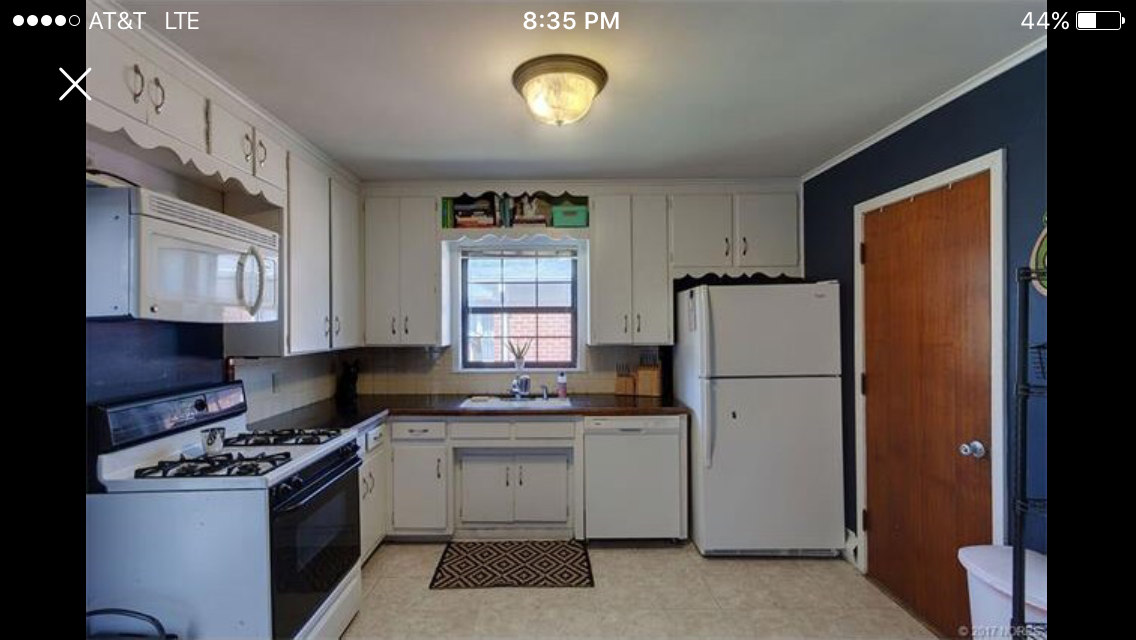
BEFORE
A week or so after moving into the house, our cabinet guy (who was FABULOUS—I’ll tell you about him later) let us know that our cabinets were going to be ready to be installed soon. We then worked quickly to tear out the several layers of vinyl flooring, disconnect appliances, and tear out all of the cabinets. We had no idea what we were doing, but my husband was incredible at figuring out how to do it the most efficient way. Once we got it all torn out, we found out the cabinet guys were having some issues and that the cabinets were going to take longer than expected. Womp womp. We were living with our refrigerator and microwave in our living room our dining table against the wall with a crockpot, blender, and griddle on top for all of our cooking. It was not fun. Not having a sink was one of the most difficult things and I never want to do it again. We used paper plates and silverware, but I had to go to the bathroom to get water for my coffee everyday. And we had to wash dishes in a tub in the bathtub. Let’s be honest, I just wiped a lot of things with paper towels. 😳🙈
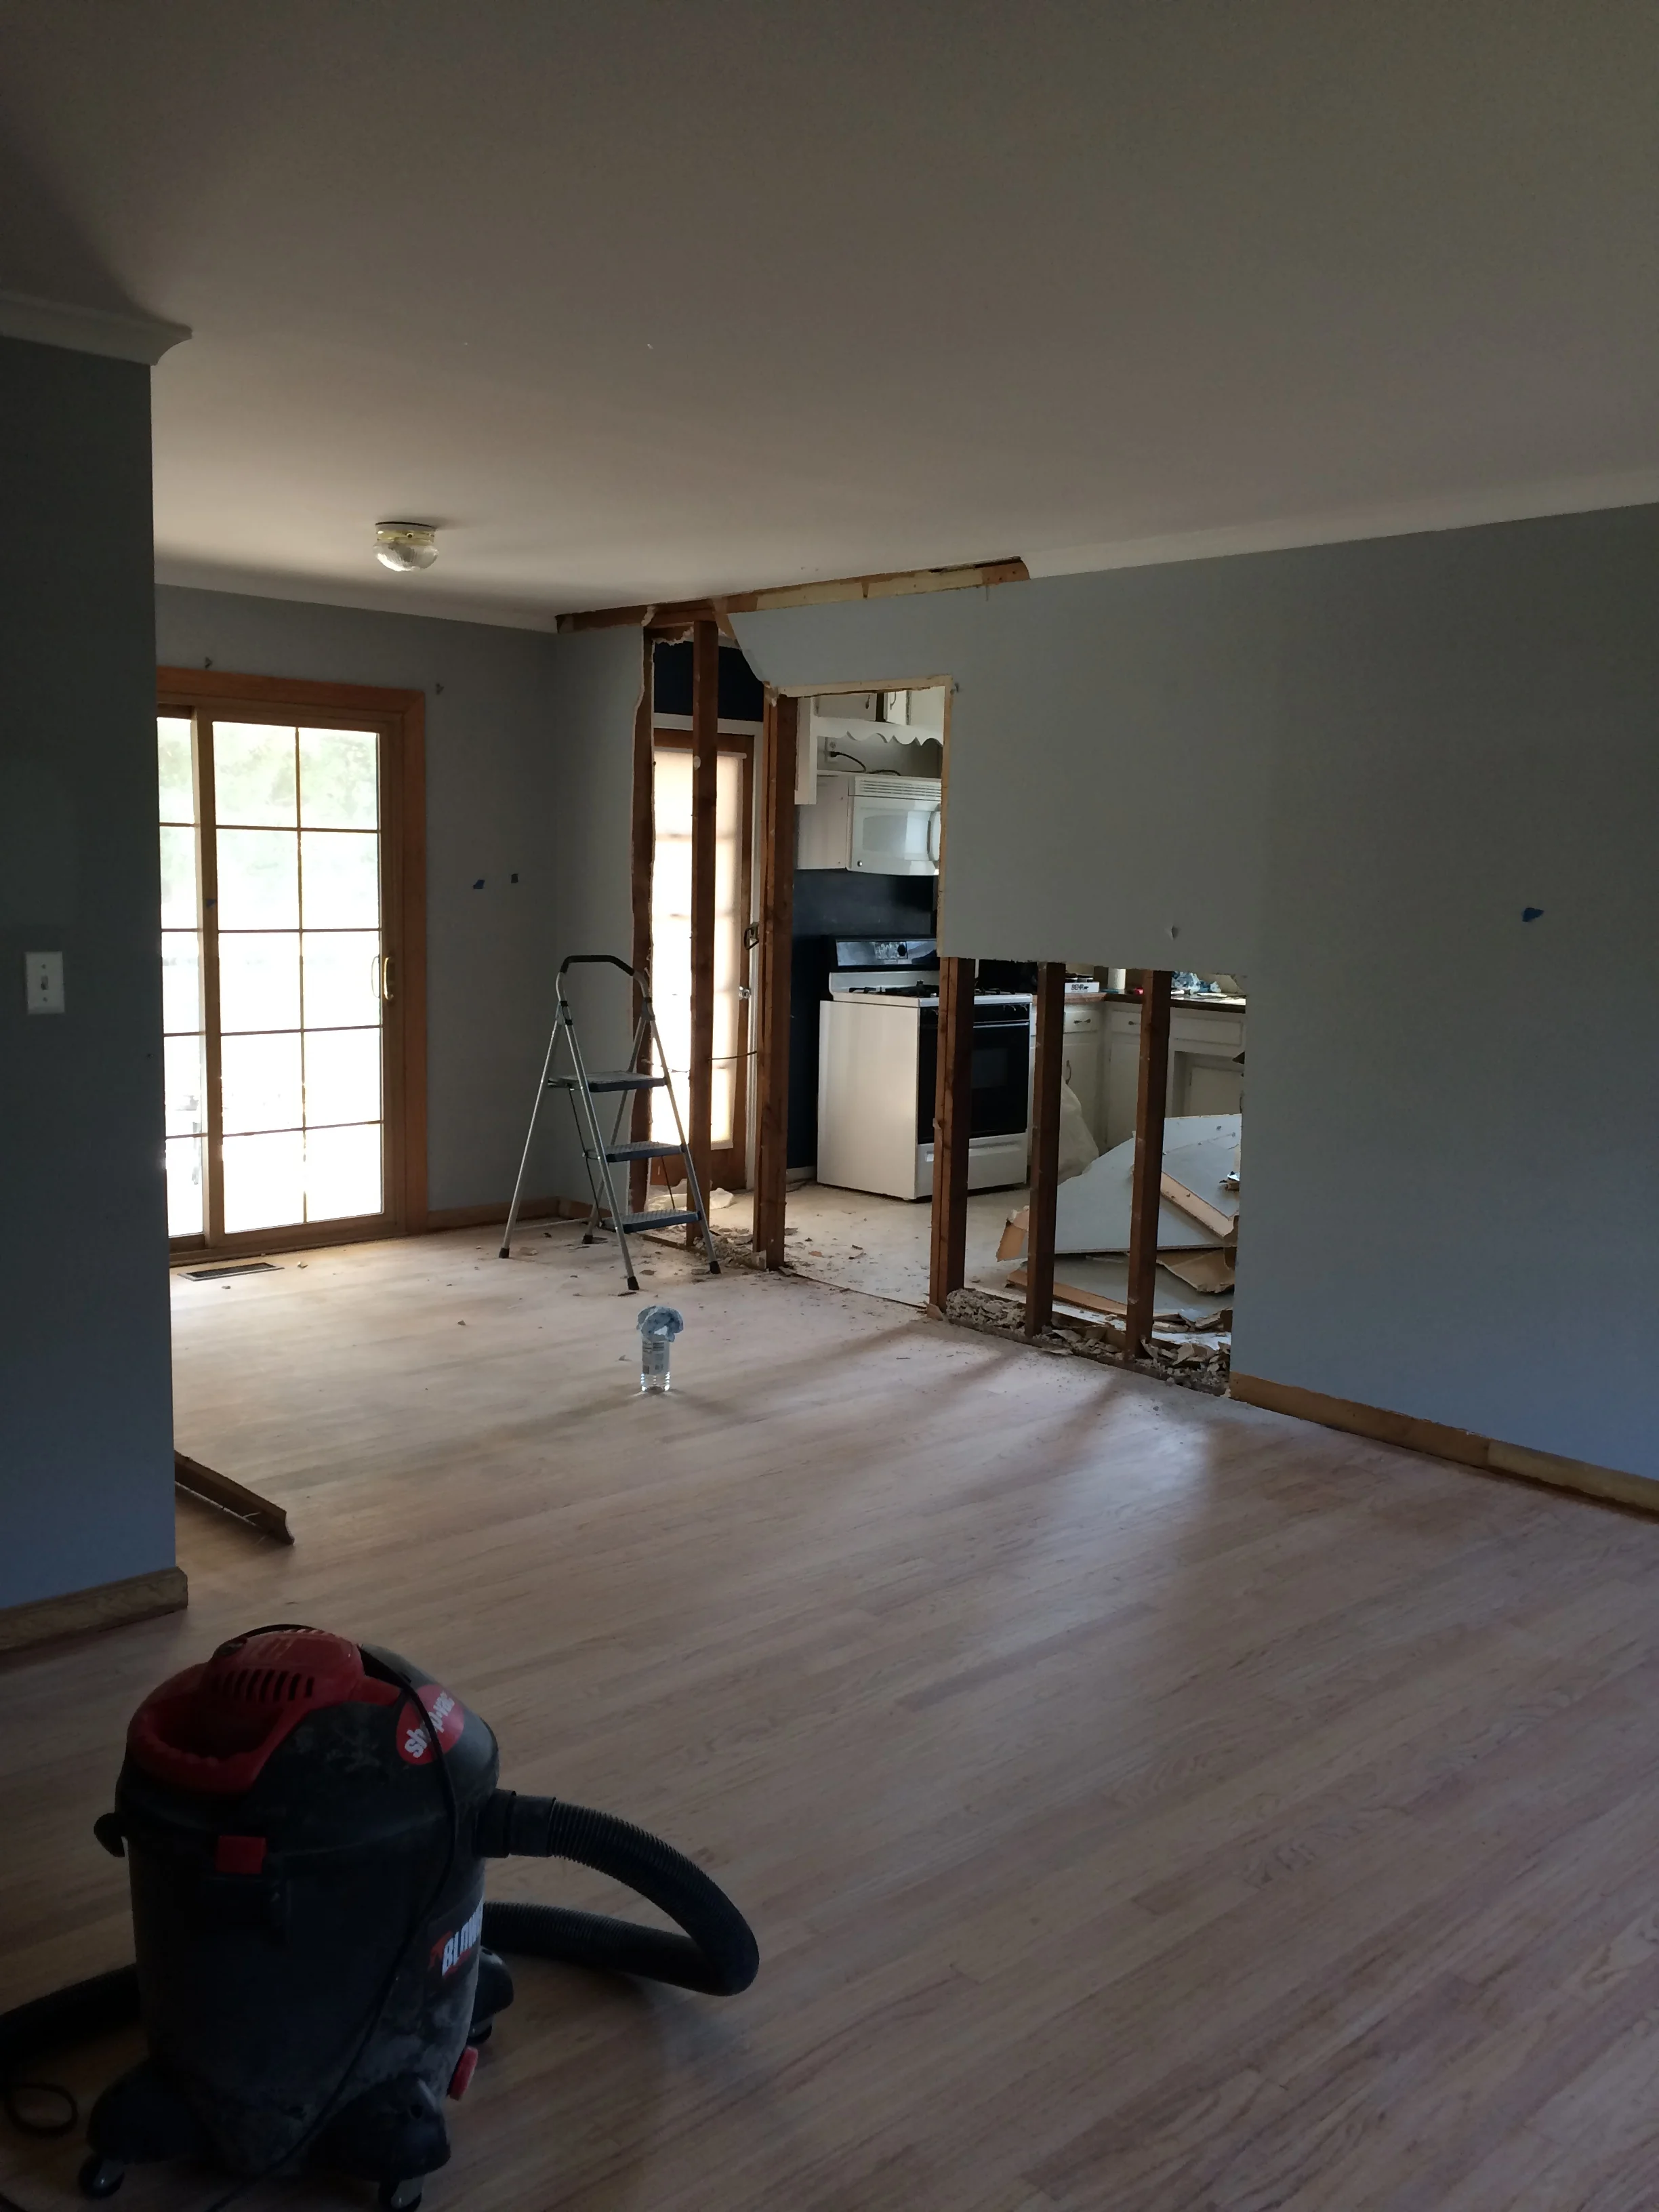
The wall is coming down!!


What a huge difference that made in how open it feels!


Eventually, the cabinet guys were able to bring over our cabinets and we had a wonderful carpenter install them. We used a local company to make our cabinets—Woodstock Cabinet Co. and HOLY MOLY they make beautiful cabinets. If you live in the Tulsa area, I highly recommend using them. They make quality custom cabinets and one of the co-owners is great about designing them to meet your needs. I really appreciated all of the thought and work he put into designing them AND making it fit into our budget.
Next were the countertops, and with the countertops, our farmhouse sink!! We got ours off of Wayfair for like 60% off—winning… It was difficult deciding what we should use for countertops. I wanted something low maintenance, so butcher block and marble were out. Let’s be real, I’m not gonna oil the countertops regularly (just check out my wooden cutting boards for proof) and I’m prone to spills. But I’m not the biggest fan of formica and thought potential buyers wouldn’t be happy with them either. So we decided to go with quartz, which can be really pricey, but we found a store that offered a pretty good deal on installation. I absolutely LOVE how they turned out! So sleek and clean.

The cabinets, countertops, sink, and backerboard are in!

Notice all those blue sticky note tabs? Those are all the spots I wanted the painters to fix (the first redo).
Next came the painters. That was a complete fiasco. Long story short, I had them come 3 different times and the last time left my cabinets with paint pulled off of them from the tape they used. Thankfully they gave me a partial refund, so I feel like they somewhat righted their wrong…but lesson learned, go with recommended people and spend the little bit extra for someone who really knows what they are doing. It was a 5 month process for all of this (yes, 5 months 🙄), and all the while, we couldn’t put on the door pulls. Did you know cabinet pulls are CARAZY expensive? They can be like $5 a piece…and when you have 27 doors that need handles, that gets super pricey. I got ours off of Amazon in bulk and although they aren’t solid metal pieces, I think they look great and they’re sturdy. It’s amazing how a small detail like that can make such a huge difference!
Somewhere in there, we had friends help us lay down the tile. And by “help us”, I really mean that they did all the tiling while we watched. Haha. But we did put in the grout, so we definitely played a role. Isaac made trim for our doors and installed a new window and put trim around it as well. I then learned how to mud and tape the top corners of our walls where we pulled off the crown molding and then painted the ceiling. We had a “boob” light fixture in the middle, and I was so grateful when we finally removed that thing. 😂

Last, we put in a white subway tile backsplash that we got from Home Depot. I am very proud to say that I put up every single one of those tiles. At like 36 weeks pregnant no less!! I’m thinking I may have to start a tiling business in my free time… 🤓


Welcome to our messy living room. Hahahaha 🙈

This area of cabinets is completely new…before, it was just a corner of walls
So what else needs to be done? We need to finish putting up random small pieces of baseboard, fix some minor details in the window, wrap the exposed beam in wood and stain it, make and install floating shelves, and install a transition strip between our kitchen and dining room. And a long list of other things for the rest of the house. But you know what? I’ve accepted it. No, I don’t have a pinterest-worthy home. But when people come into my home, they really don’t care what it looks like. They care about how I make them feel when they are there. I want people to feel welcome, loved, listened to, and important—I don’t have to have a perfect home to do that. So for now, I’ll wait on those details and instead invest my time and energy into loving and taking care of Cam and those around me!